In order to connect our Docxpresso instance to Google Drive we need first to create a project in our Google Developer console.
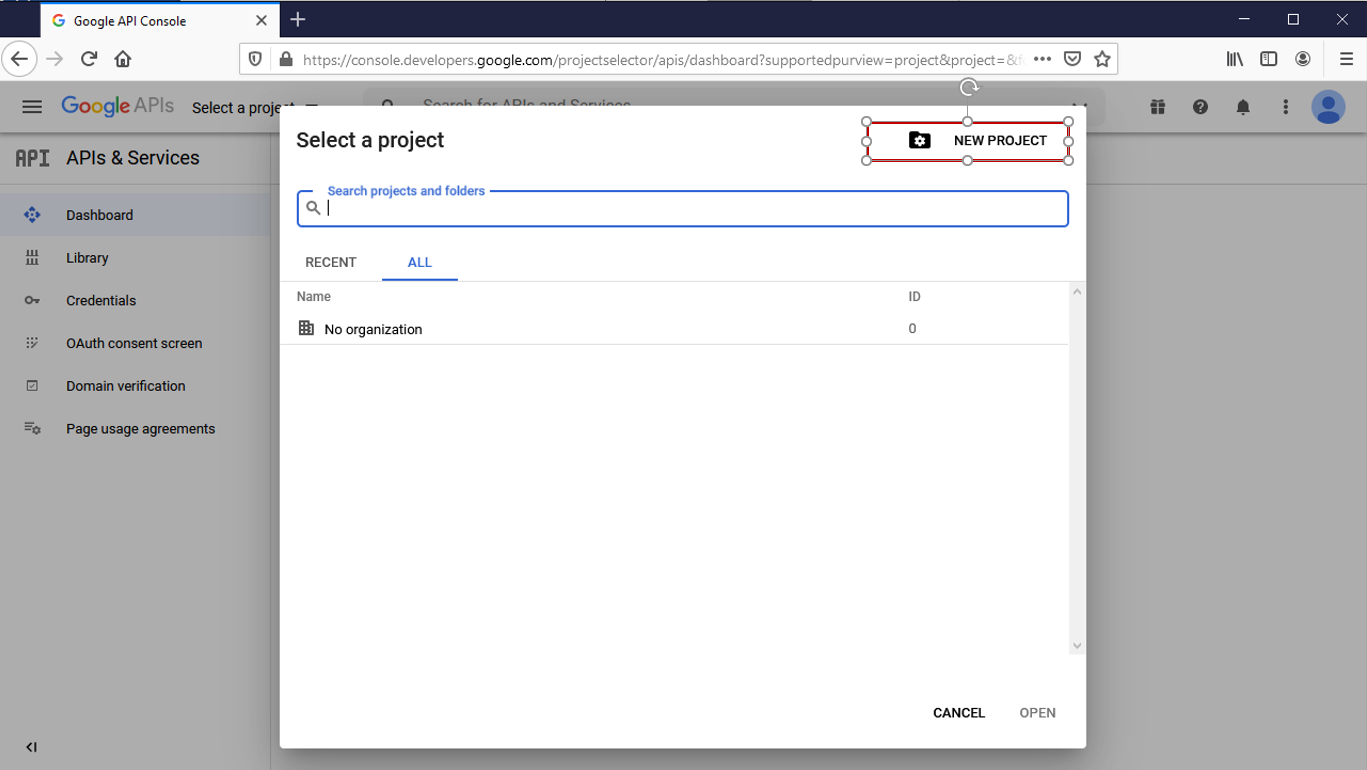
Click on Select a project and then CREATE NEW PROJECT in the popup:
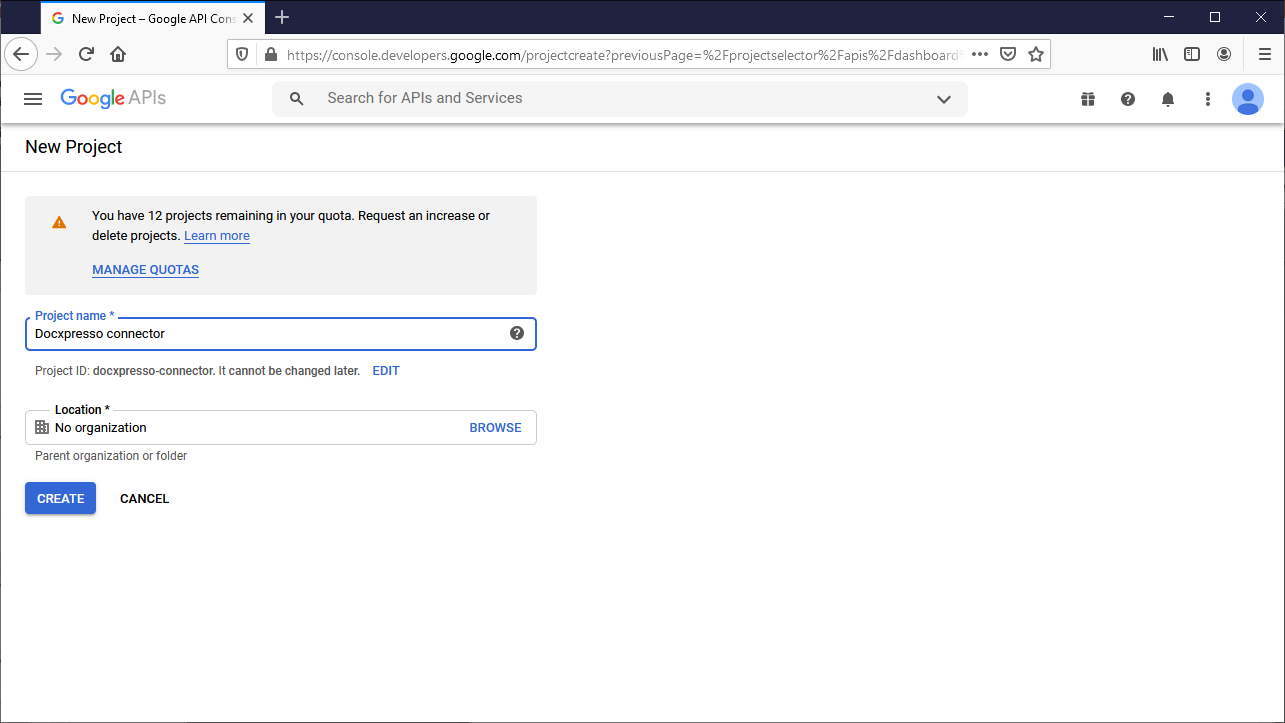
Give the project a meaningful name and hit the Create button:
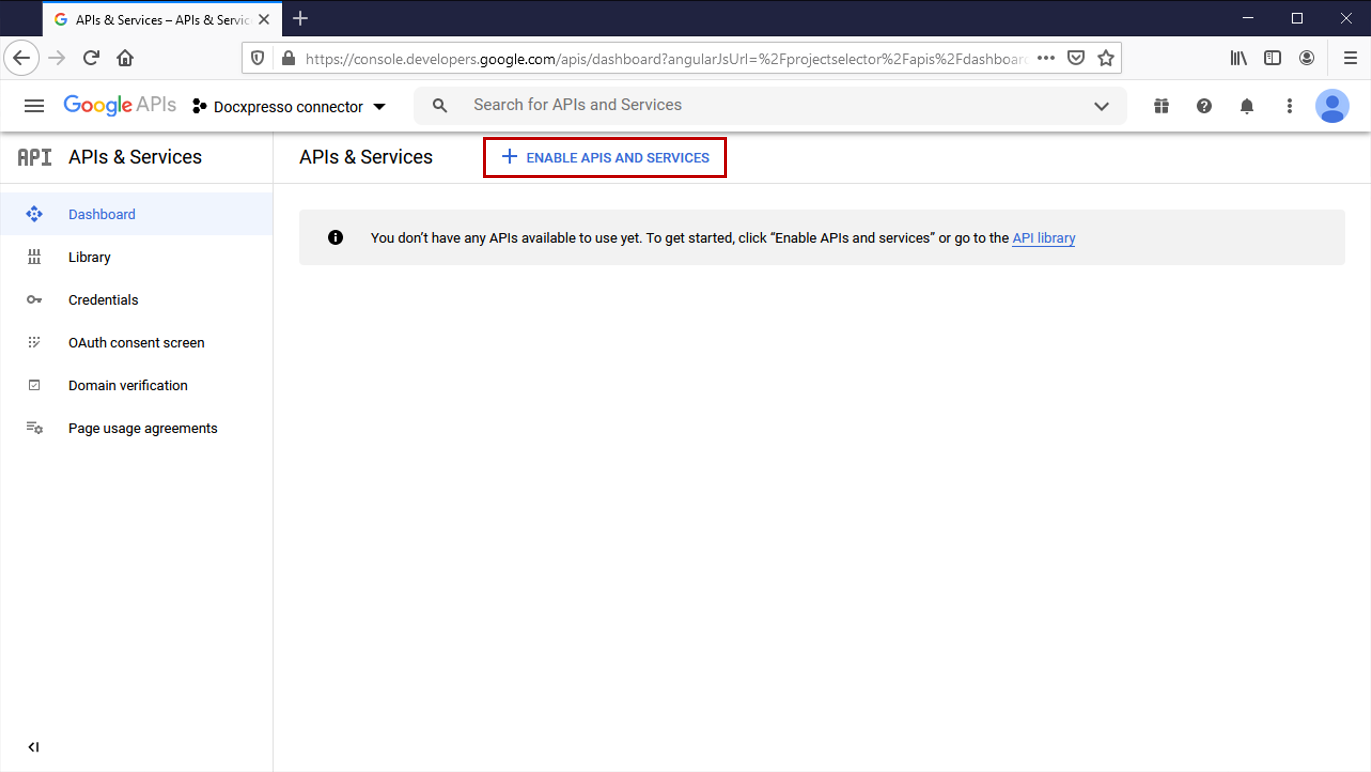
Select the recently created project and enable the required APIs:
And then activate, at least, the Google Sheets API:
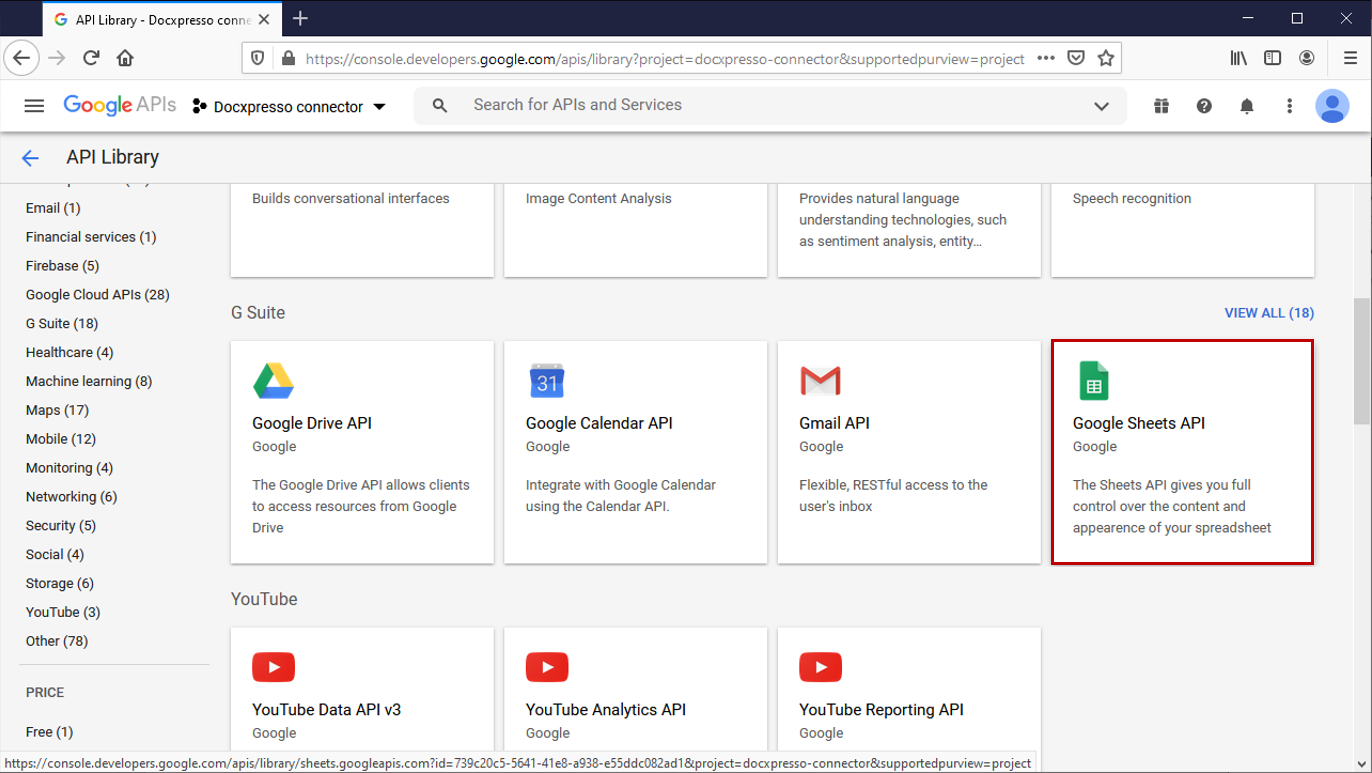
Just click in the ENABLE button:
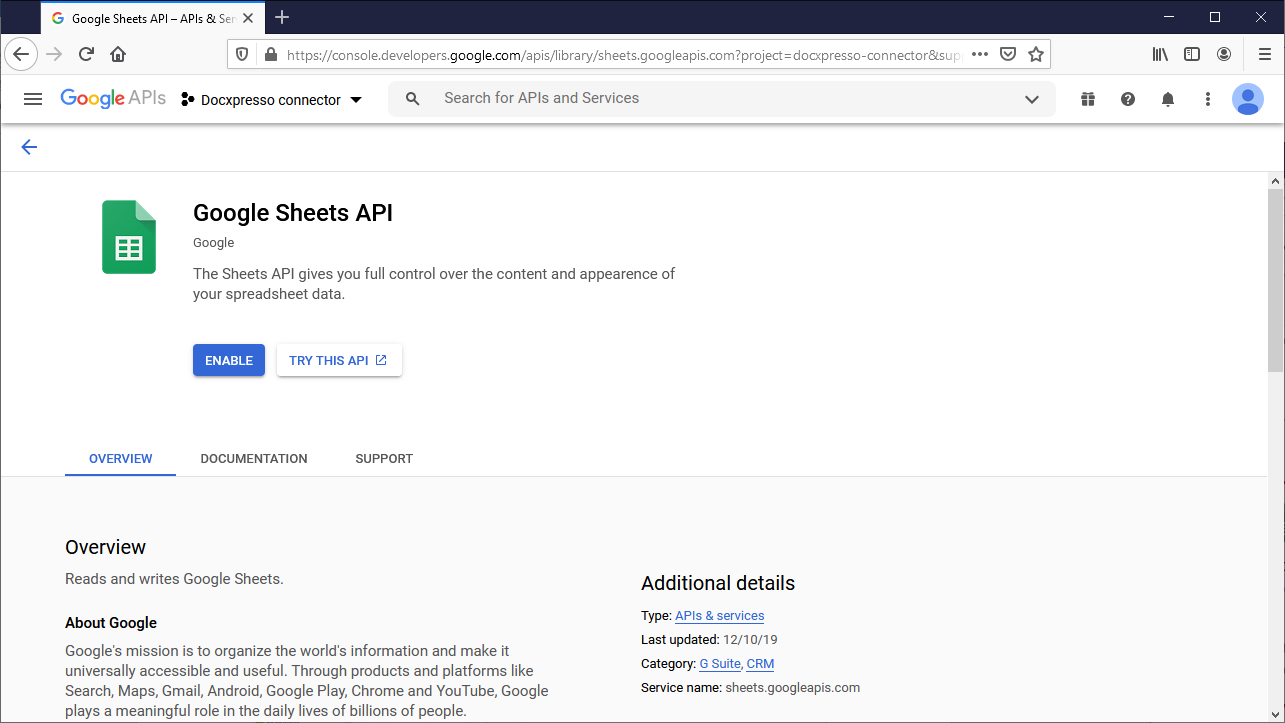
And you are redirected to an interface where you may choose the required credentials:
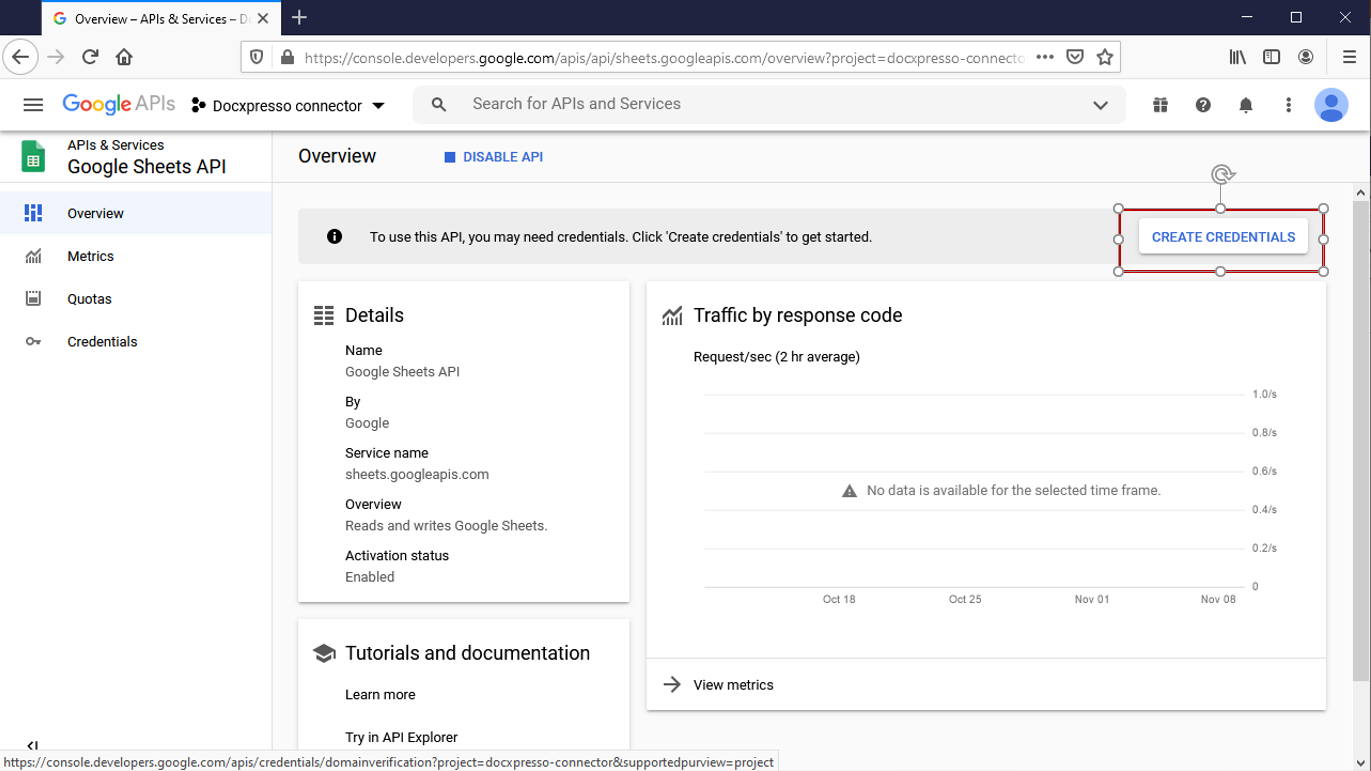
You are redirected to this interface:
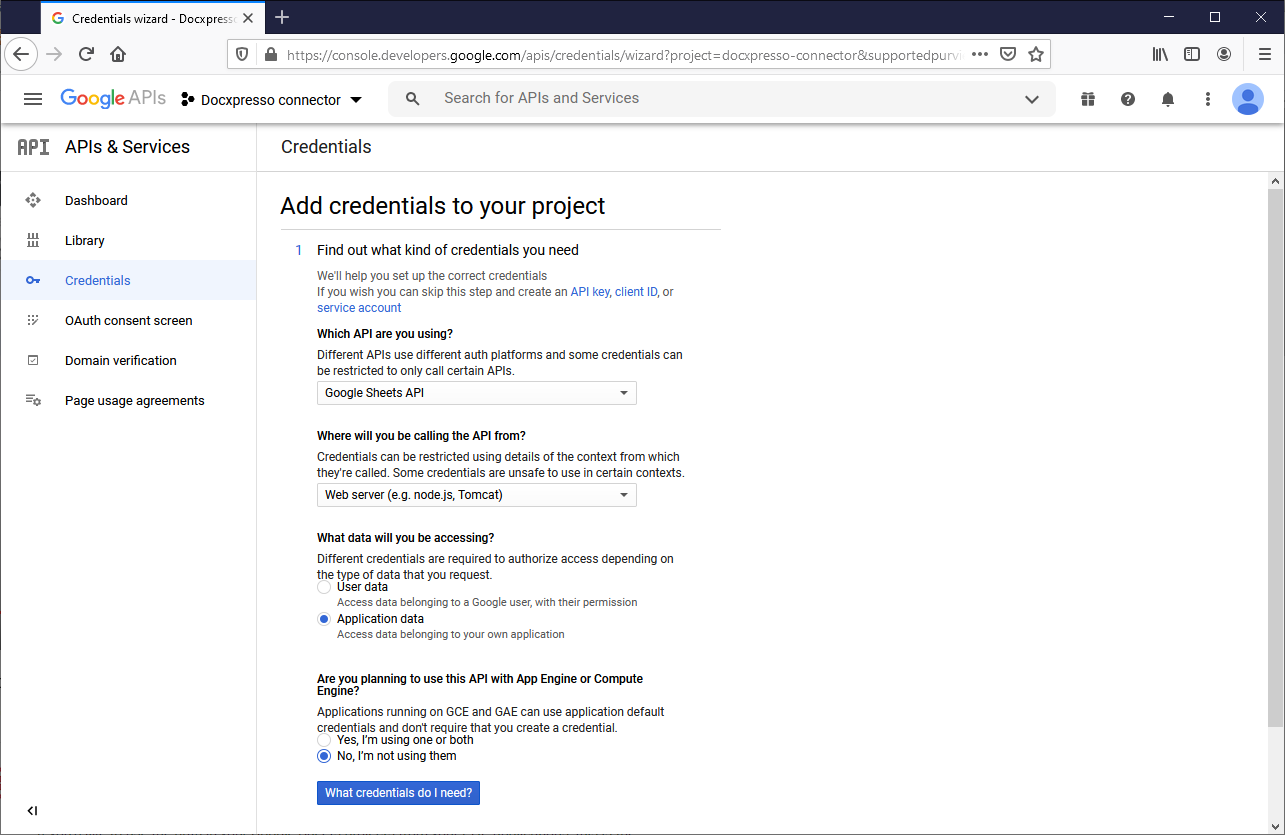
Where you have to choose:
- The API you are using: Google Sheets API
- Where you will be calling the API: Web server
- Type of data: Application data
- If you are using Google Computing Engine: No
Then click on What credentials do I need? Button:
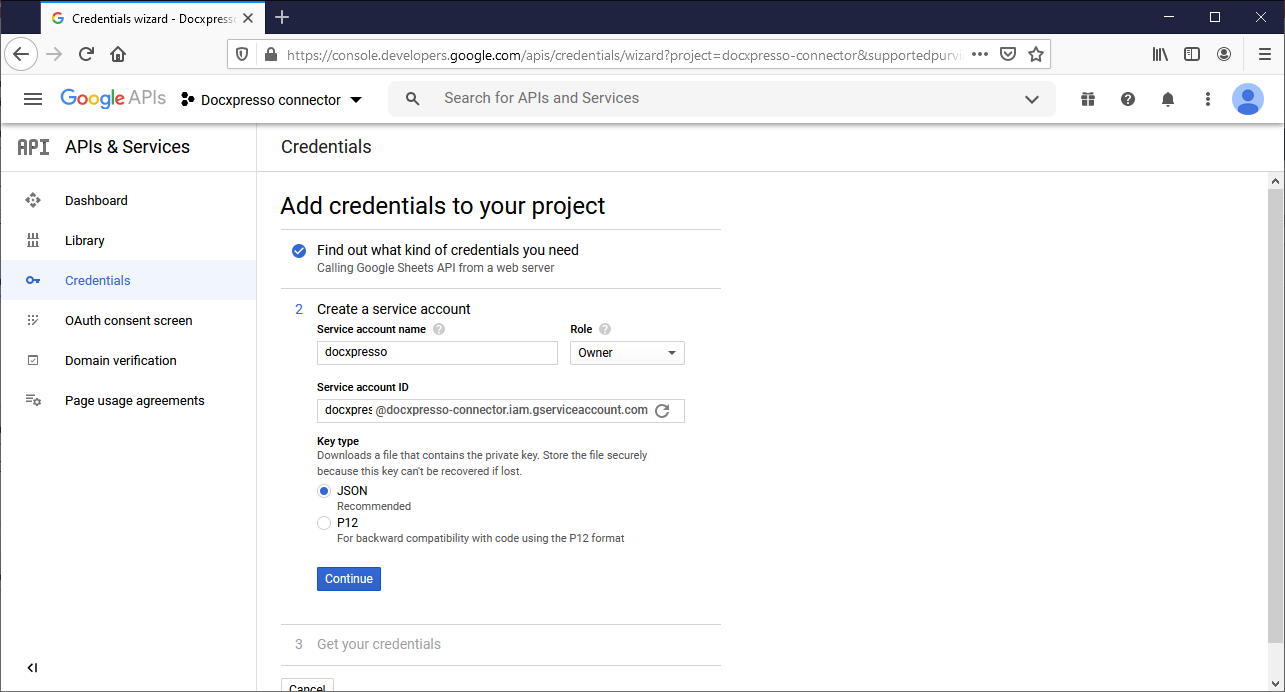
Give it a name to the Service account and select as Role: Project > Owner and hit the Continue button.
IMPORTANT: you will be invited to save a JSON file in your computer with the required credentials.
After saving the credentials JSON file you will be redirected to:

IMPORTANT: You need to copy the email associated with the Service account because you have to use it whenever sharing a Google Sheet with Docxpresso.
With all this data we now may pass to configure Docxpresso account.
Docxpresso Configuration
With all the gathered app data we may now easily configured the Docxpresso integration.
Go to Integrations > Cloud providers and click on the Google tab:
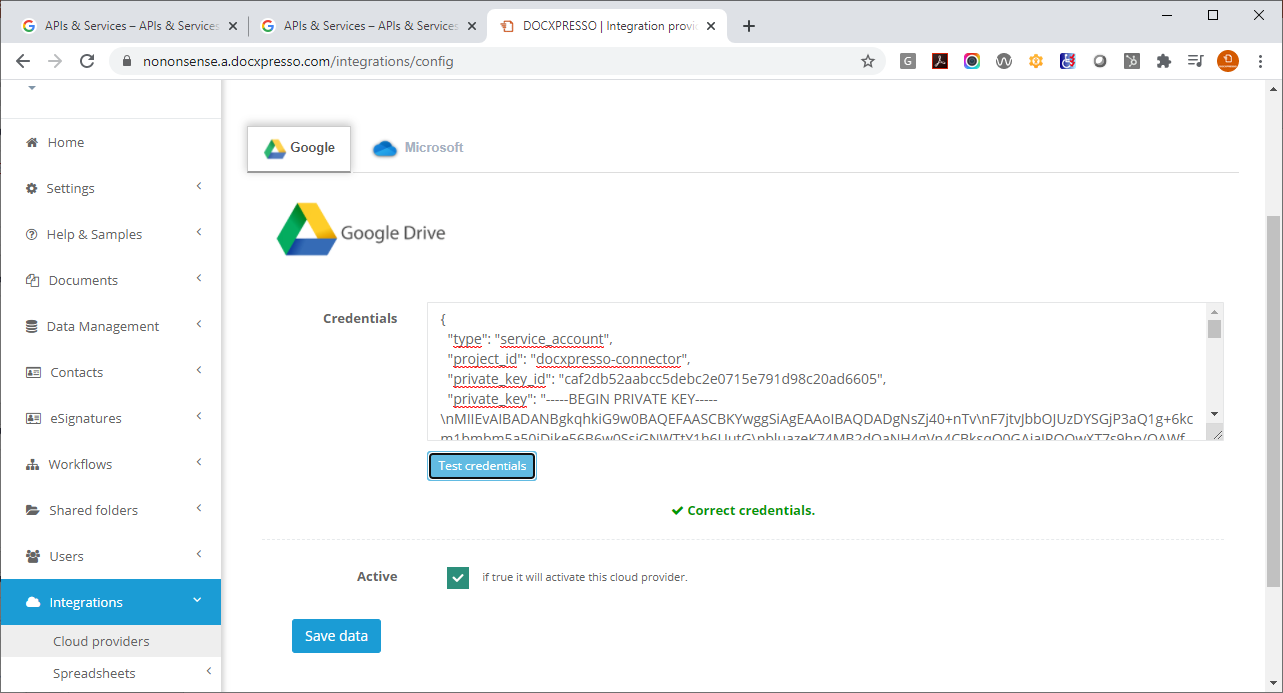
Include the JSON credentials and hit the Test connection button and if the response is that the connection has been correctly set up just hit the Save data button. If otherwise you get an error you must check that the service account has been properly set and you have introduced the correct credentials.
Cloud Spreadsheets
In order to connect a Google Sheet stored in Drive we need to “parametrize” them within Docxpresso.
In order to create a connector one should first click on Integrations > Spreadsheets > Add spreadsheet to access the following interface:
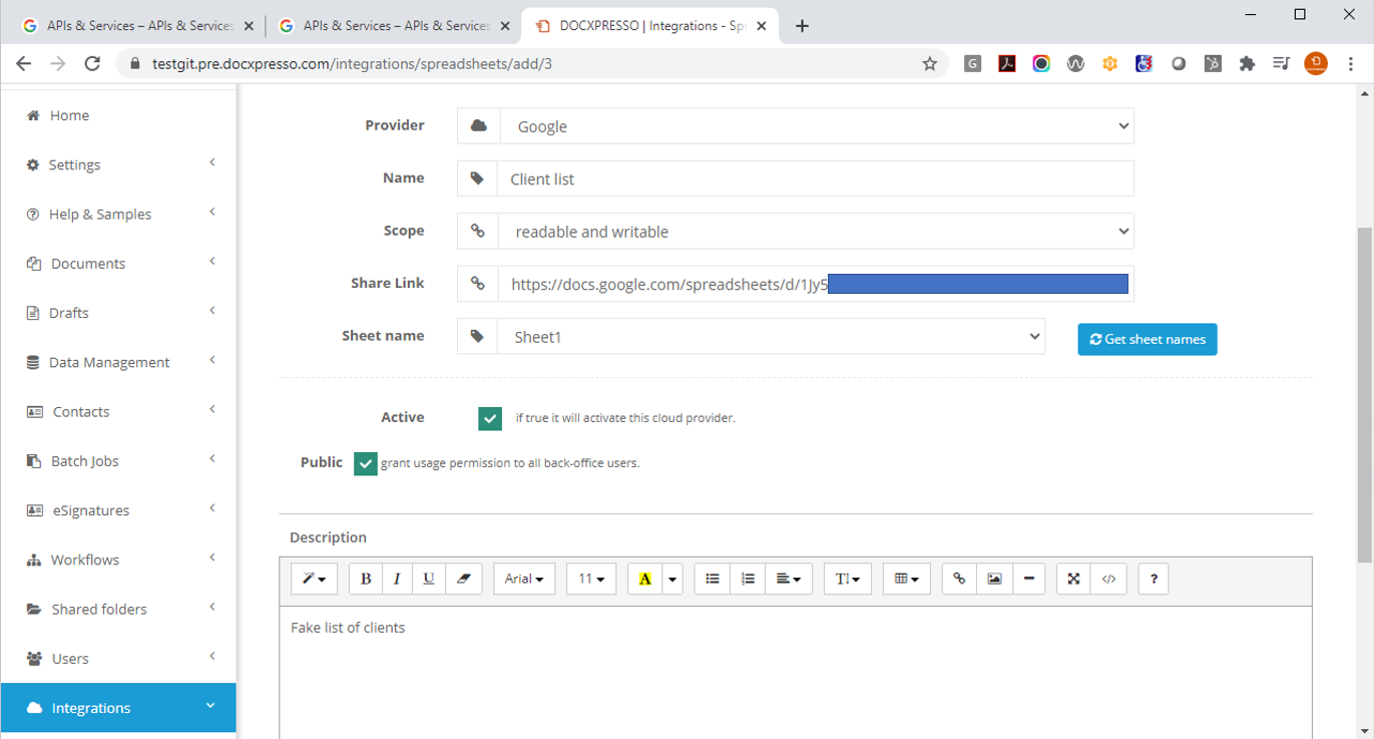
After choosing Google as cloud provider one should include:
- A name to identify the spreadsheet within Docxpresso
- The scope has the following options:
- Readable: only to import the data to a Docxpresso document
- Writable: only to export data from a Docxpresso document
- Readable and writable: both import/export
- The share link to connect to the selected spreadsheet. Include the Service account email within the Share Link interface in Google Drive.
- Sheet name: one can only import/export from a single sheet within an Excel file so the user is prompted to select one: click on Get sheet names and select one from the dropdown
IMPORTANT: the first row of the selected sheet should include the field names that ideally coincide with the one used in the associated templates (although this is not strictly required as we will see later).
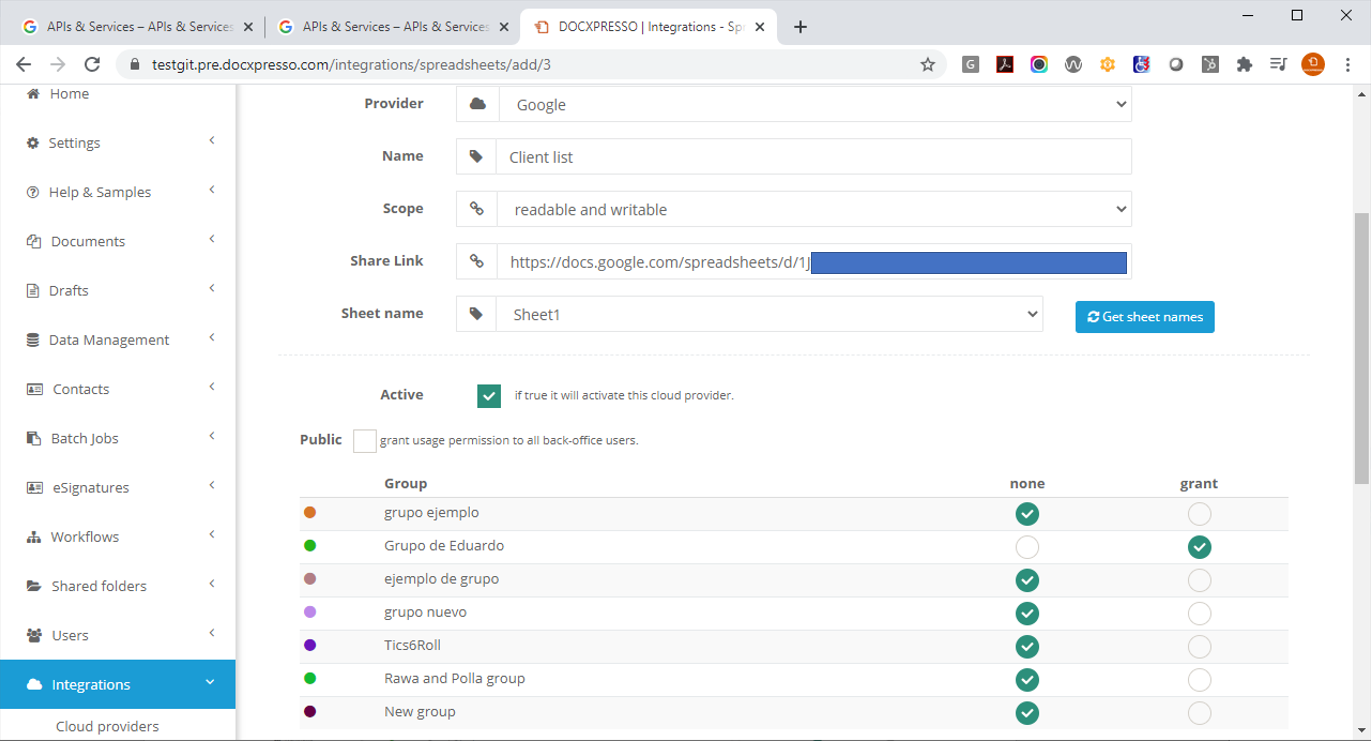
You may also limit the usage permissions by group in case you uncheck the Public checkbox:
Once you have defined the spreadsheet within Docxpresso is ready for its use.
Import data from a Cloud Spreadsheet
Whenever a backoffice user is editing a Docxpresso document or web form (s)he is offered the possibility to import data from a predefined spreadsheet.
The back-office users of Docxpresso may access this Excel data from:
To open a popup interface where to choose from one of the available spreadsheets:
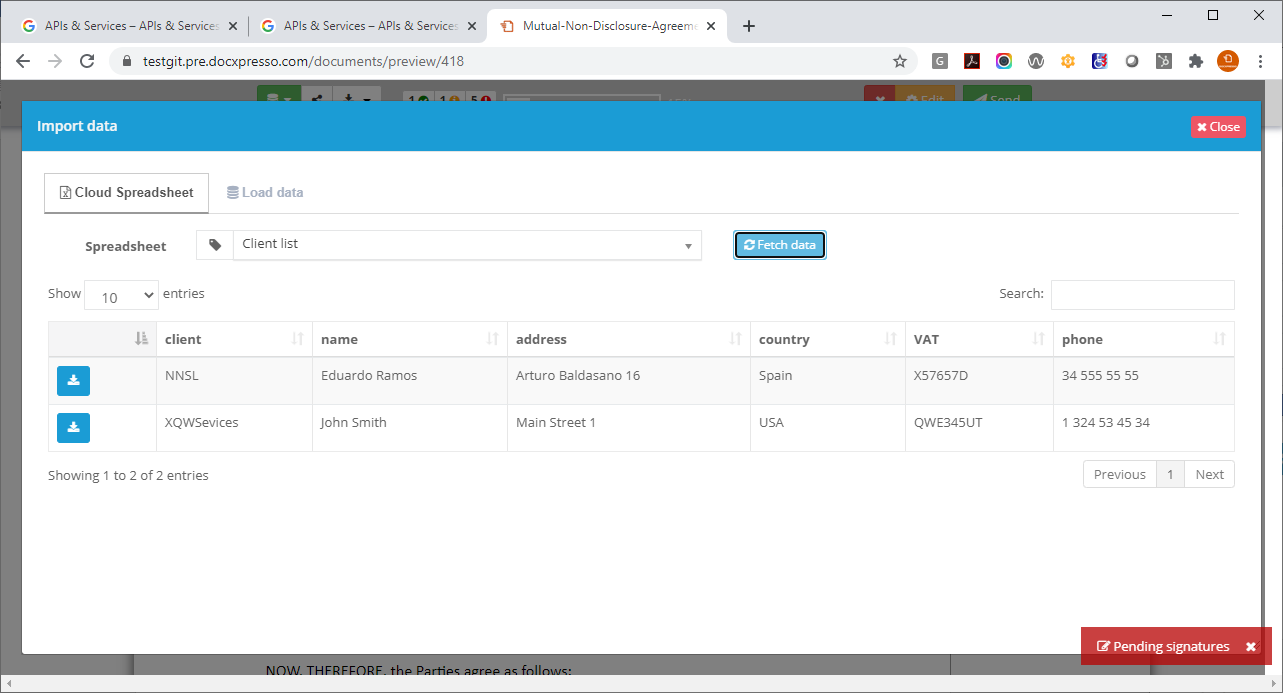
By clicking on the “load” button of the selected row we are redirected to an interface where we can map the spreadsheet fields of our choice to the available Docxpresso template fields:
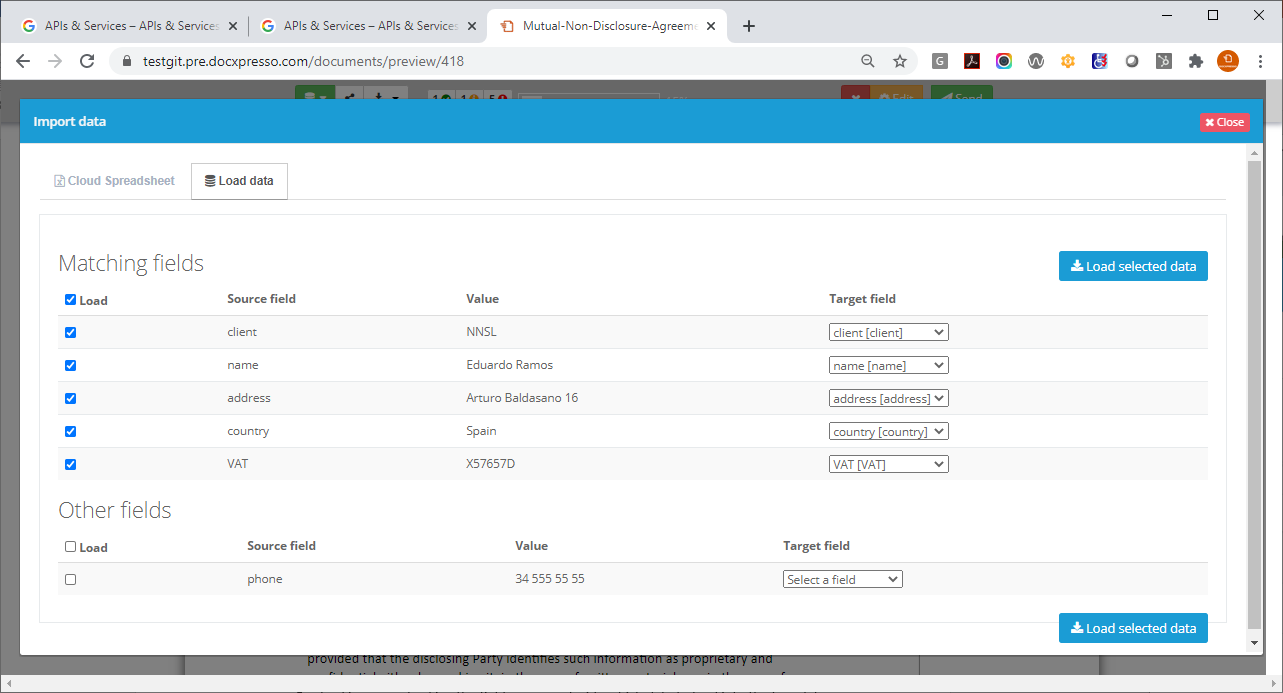
Note that:
- Coincident name fields are automatically mapped.
- We can manually change the automatic binding by clicking in the dropdown menu and selecting a different target fields.
- By checking or unchecking the fields we may decide which data to load into the template.
Whenever we are ready we may load all the selected data by clicking on the Load selected data button and import it into our document:

Export data to a Cloud Spreadsheet
As explained before we may also use Docxpresso to export data to an existing cloud spreadsheet.
Let us use the same template and spreadsheet file as before but now to implement the opposite process, i.e. to load data from the document into the selected sheet.
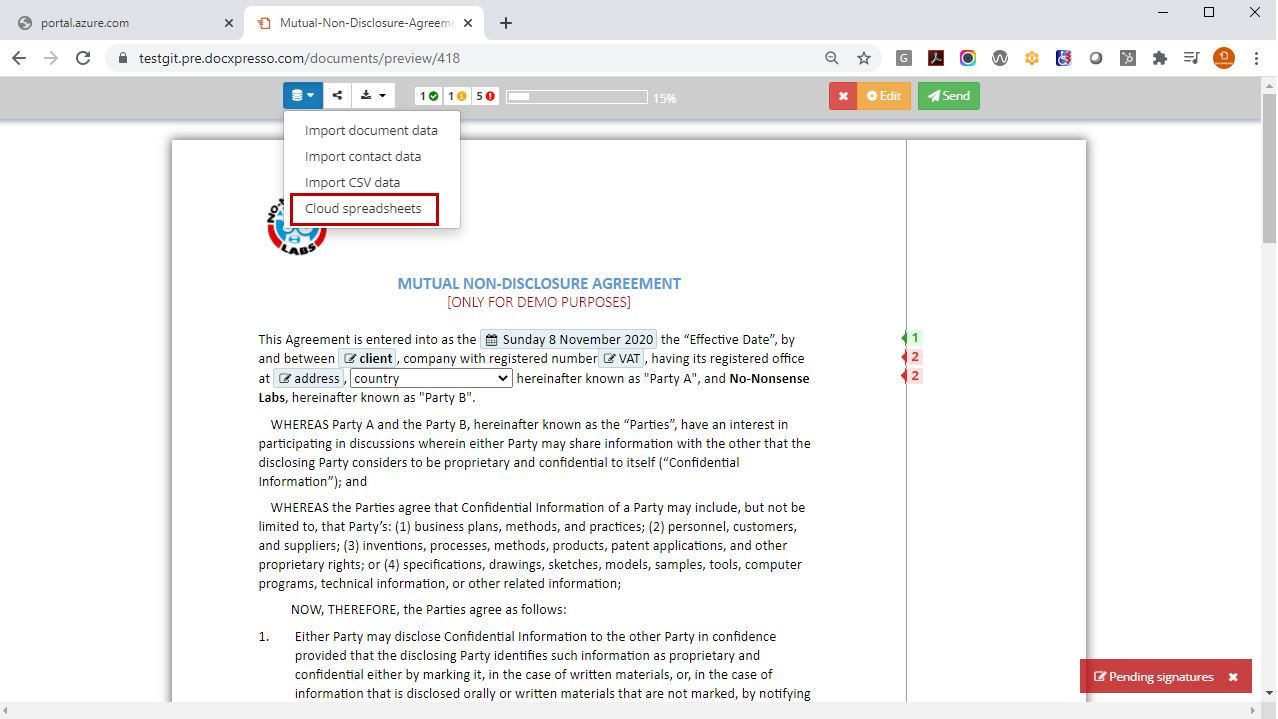
First open the template edition interface within the Docxpresso back-office and then click on Cloud spreadsheets from the dropdown menu:
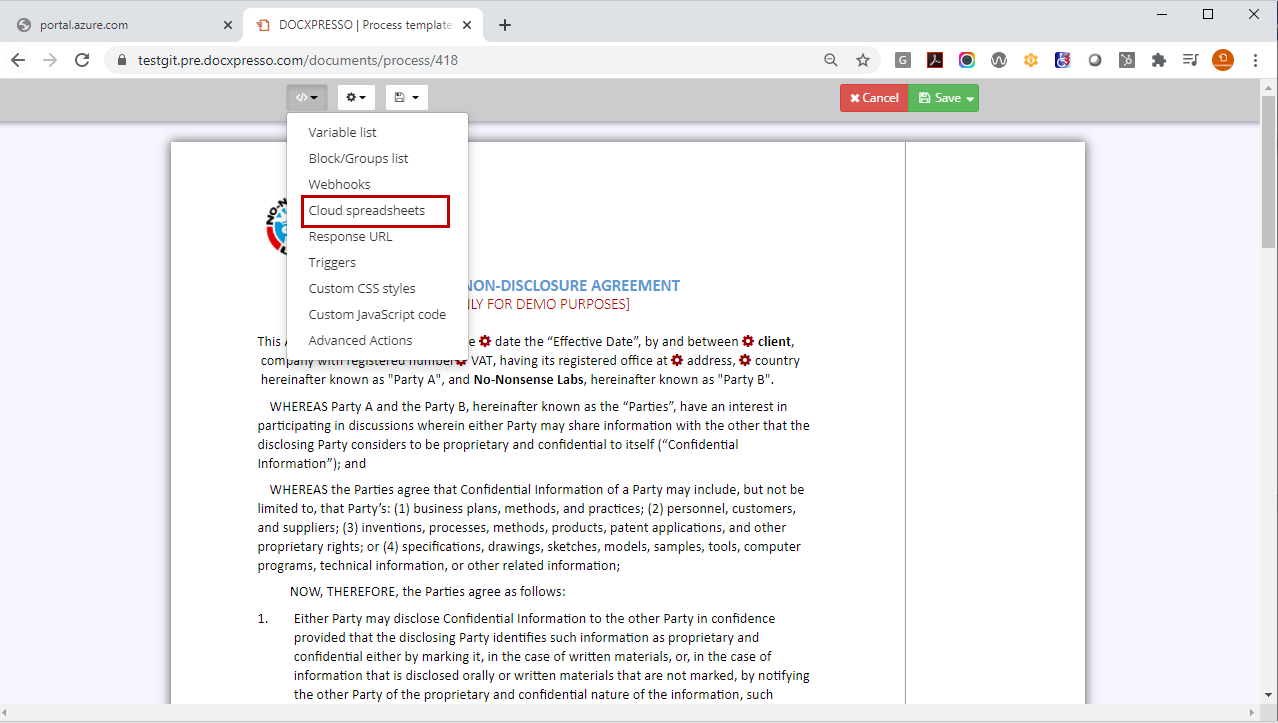
Then the following interface opens:
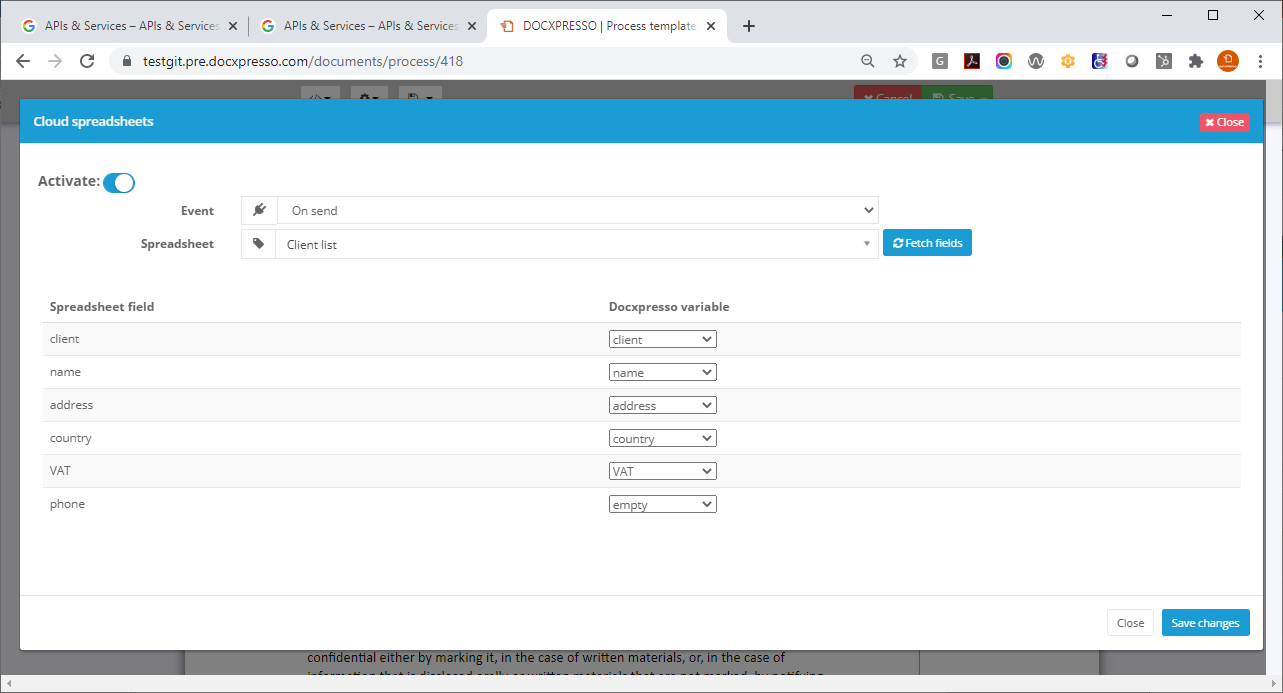
Within this interface one should:
- Click on the activate switch if we want to activate the remote data exportation process.
- Choose an event:
- On load: the export will be carried out each time the document is filled and saved.
- On set as completed: the export only will be processed whenever the document is explicitly set as completed.
- Select a spreadsheet from the dropdown menu and hit the Fetch fields button.
- Select the data bindings: coincident fields will be automatically assigned although we can manually
change the associations. One can also chose “empty” if we do not want that field to be mapped.
IMPORTANT: if you carry out changes in your spreadsheet file you may need to remap the fields into the Docxpresso interface.
Finally, by clicking on Save changes you will activate the syncing of your cloud spreadsheet file and your Docxpresso data.
