In order to connect our Docxpresso instance to Microsoft365 and/or Sharepoint we need first to create an App in our Active Directory via our Azure portal.
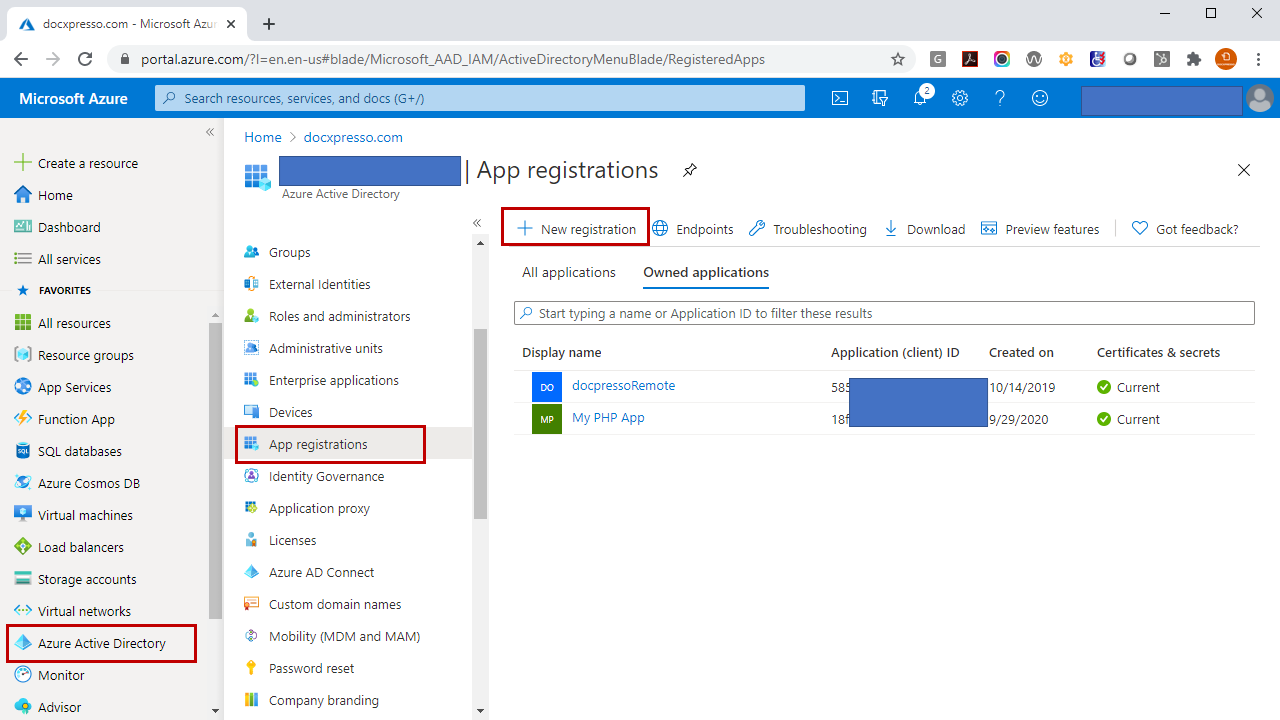
In order to do so click on the Azure Active Directory main menu entry, choose a tenant or create a new one to handle all remote interactions with Docxpresso and then click on App registrations to access the following interface:
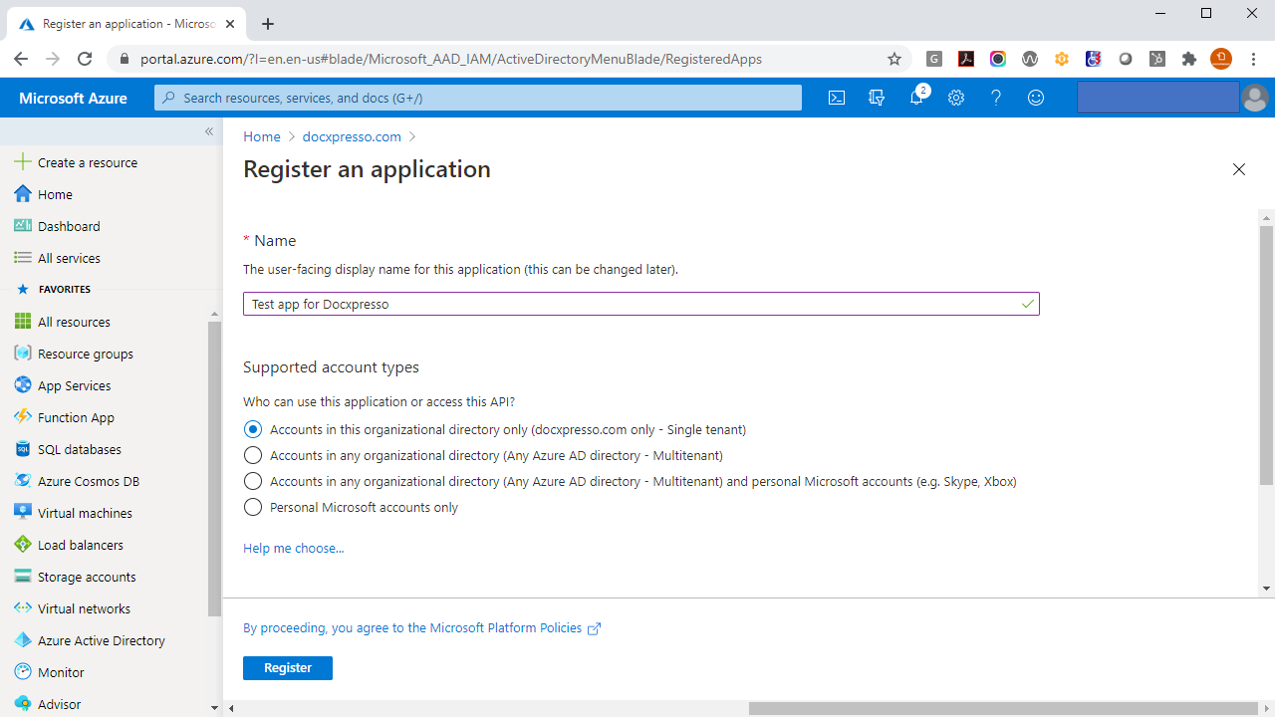
Now click in the New registration button located in the top menu to access the web interface to create your new app that we will integrate with Docxpresso.
Give a name to your app within Azure and click register:
The app is created:
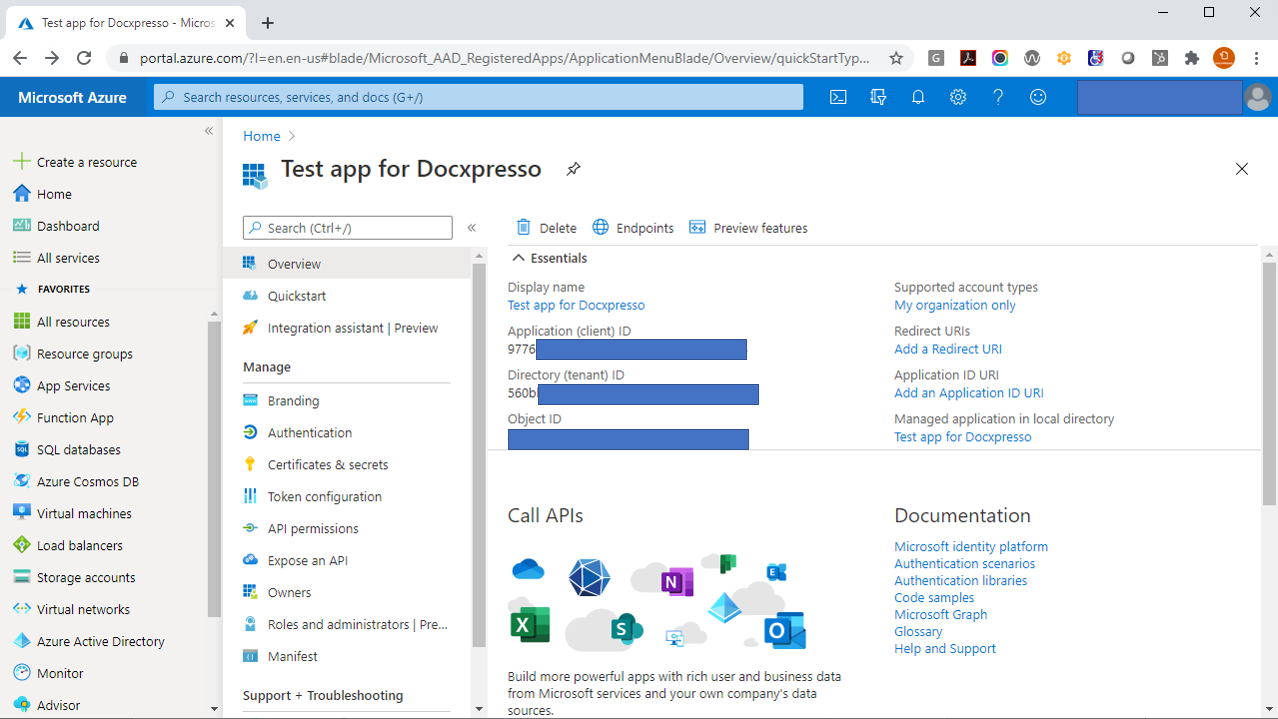
Now you need to copy two parameters to be used later in the Docxpresso configuration:
- Application (client) ID
- Directory (tenant) ID
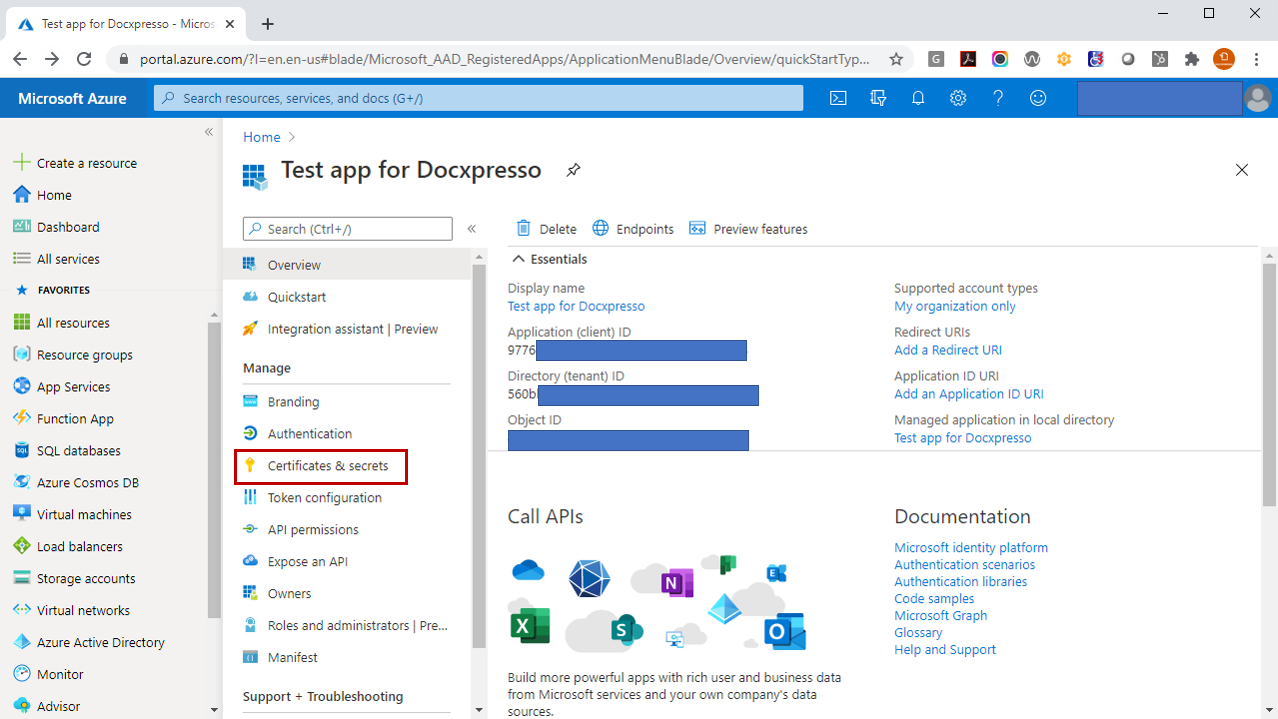
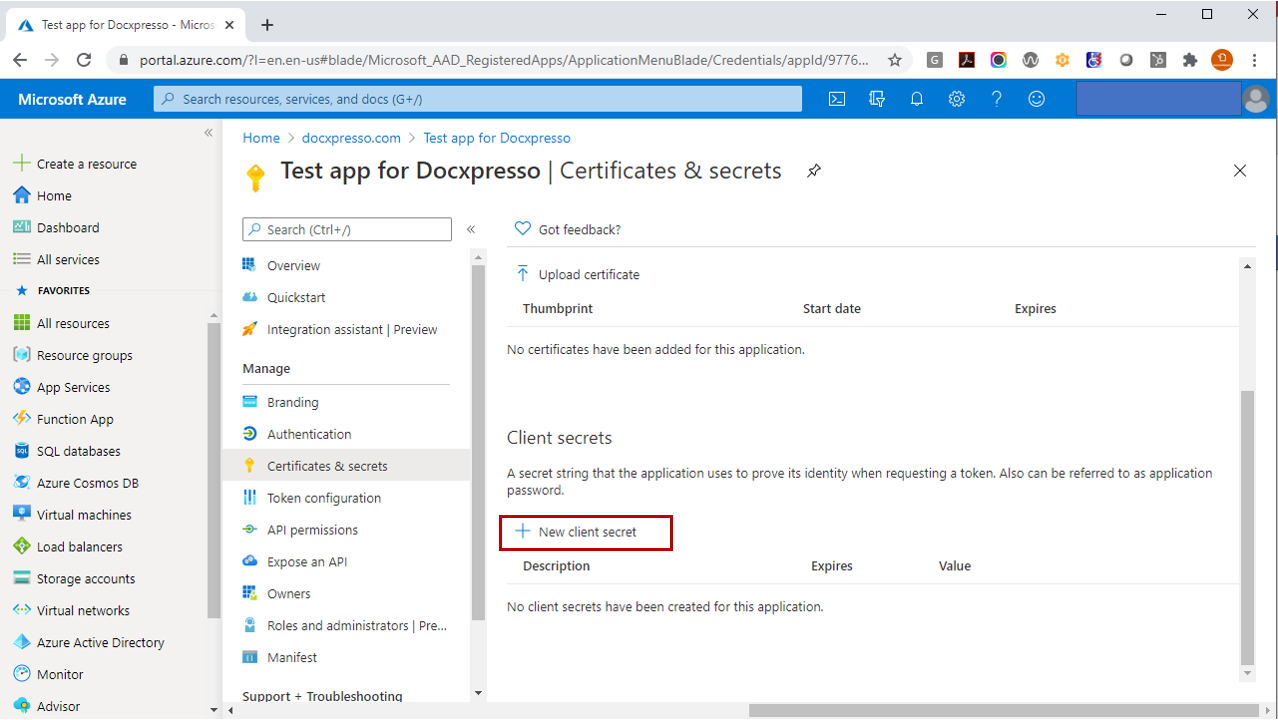
Create an app secret
In order to access remotely the app from Docxpresso you need to generate a secret. In order to do so click on Certificates & secrets menu entry:
So you access the interface where you can generate a secret by clicking on the New client secret button:
A pop up window shows:
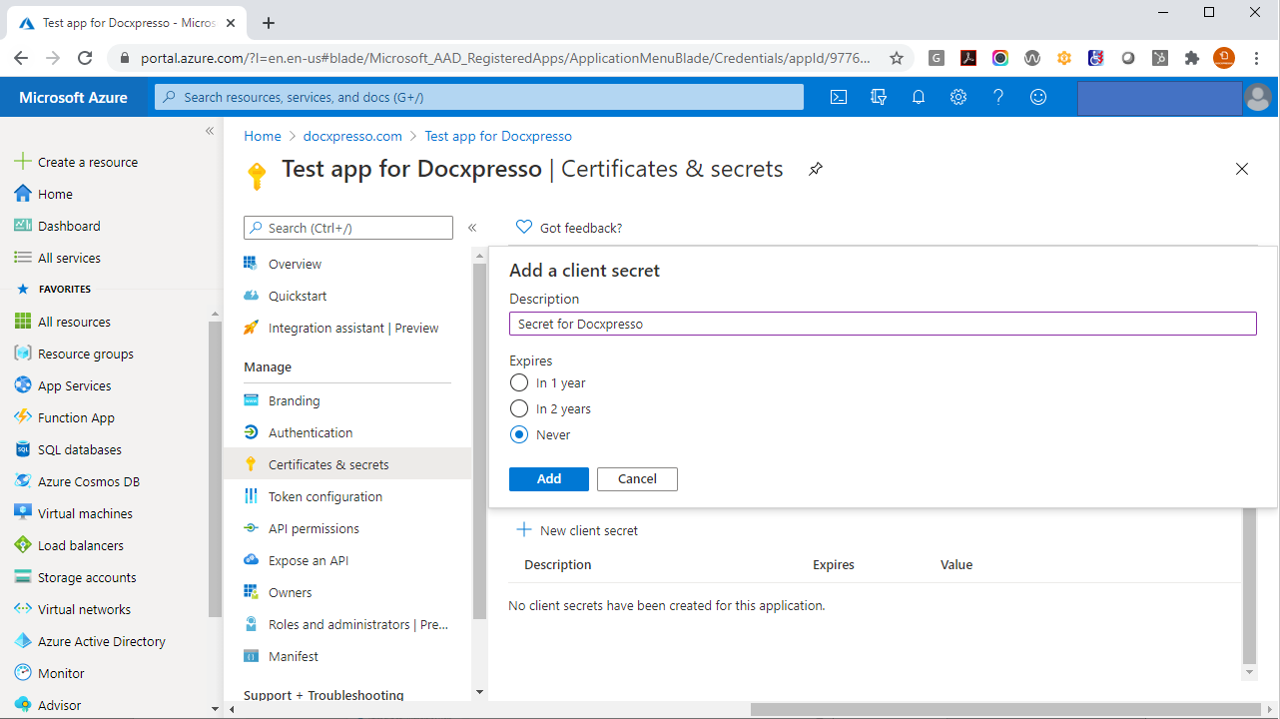
Give it a name and choose Never if you do not want to worry about possible unexpected expirations. Then hit the Add button:
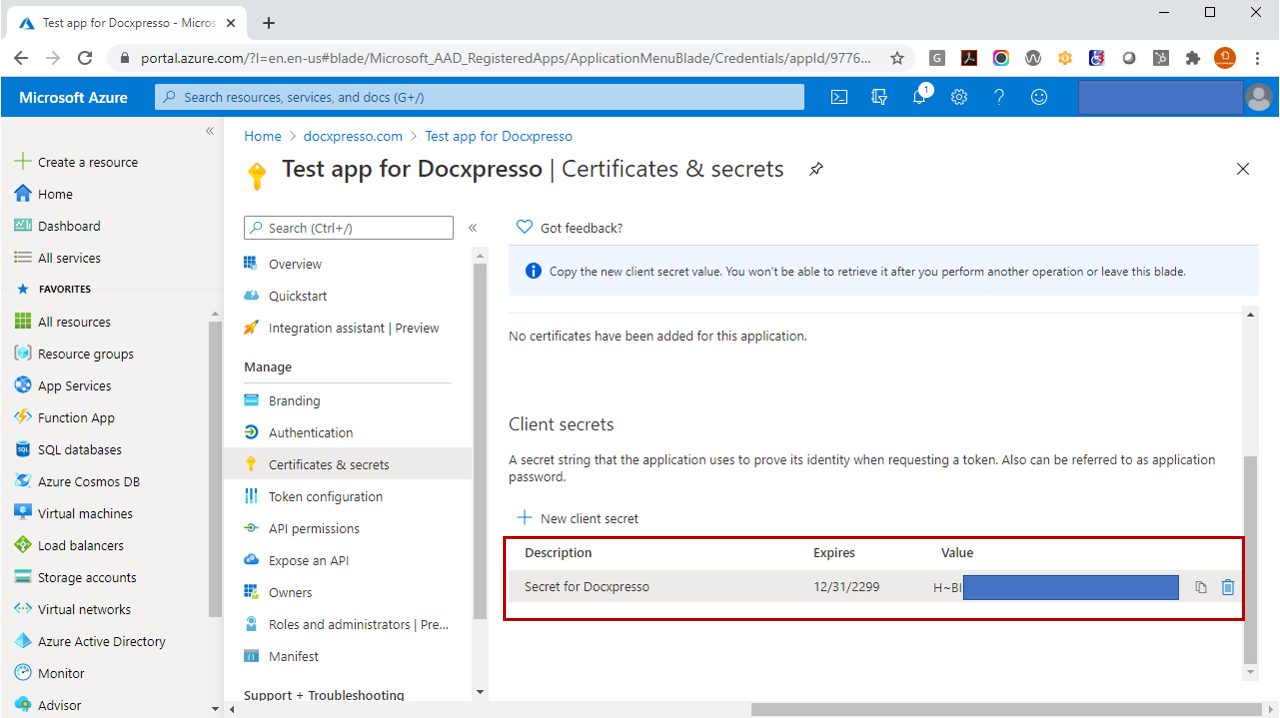
And the secret is generated.
IMPORTANT: you have to copy the secret right away because you will have no later access to it although you can always generate a new one.
Granting permissions to the created app
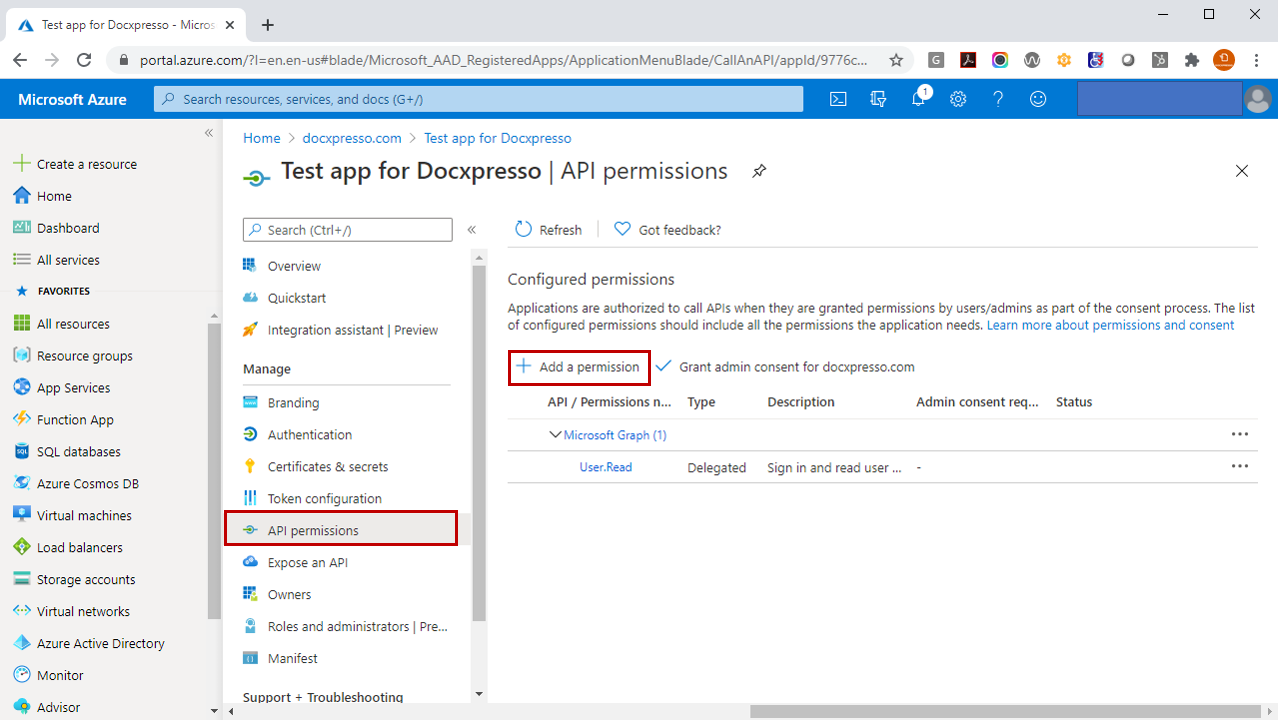
Now you need to grant permissions to the app so it can access remote files with Read/Write permissions.
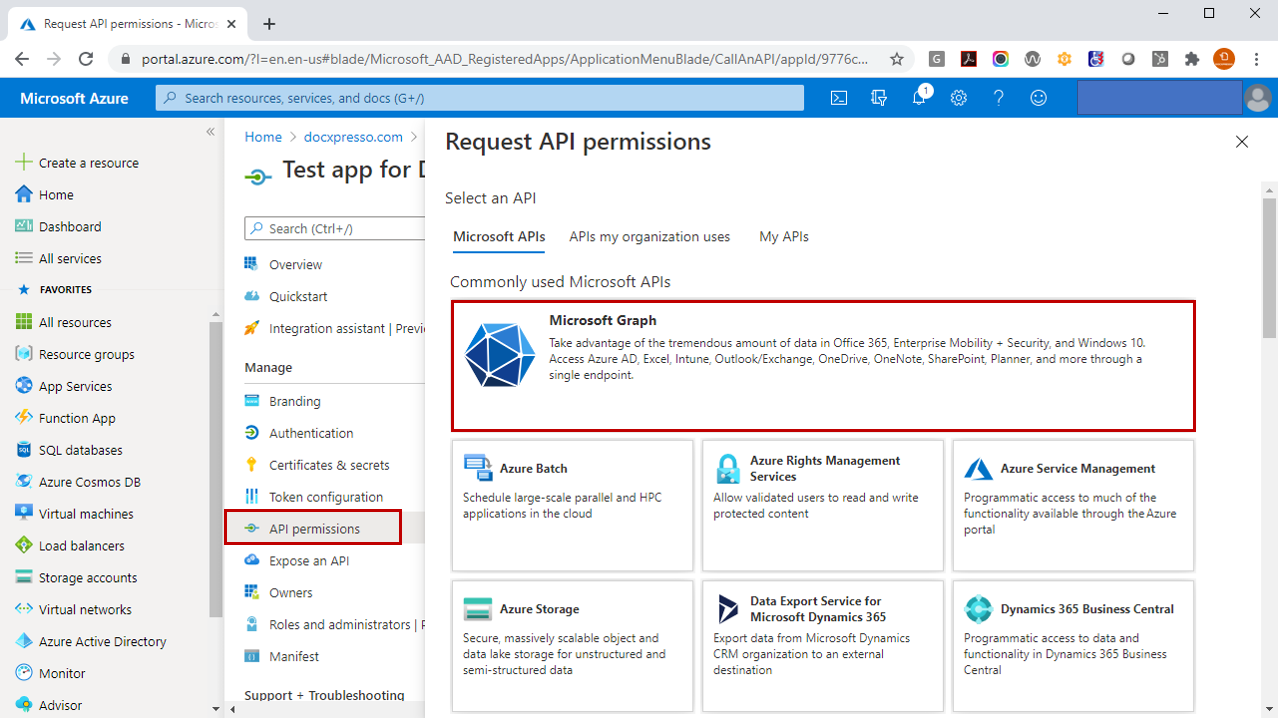
In order to do so click on the API permissions button and the Add a permission button to add the minimally required permissions:
Then click on Microsoft Graph:
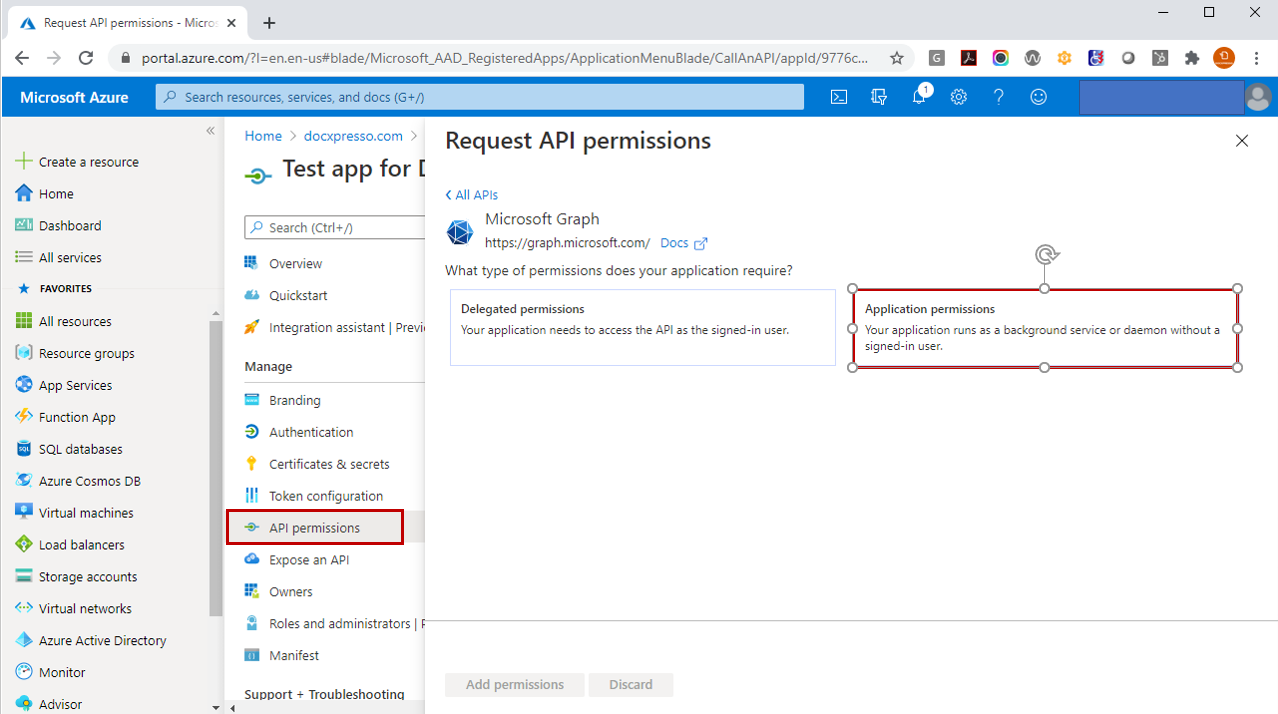
Click on Application permissions:
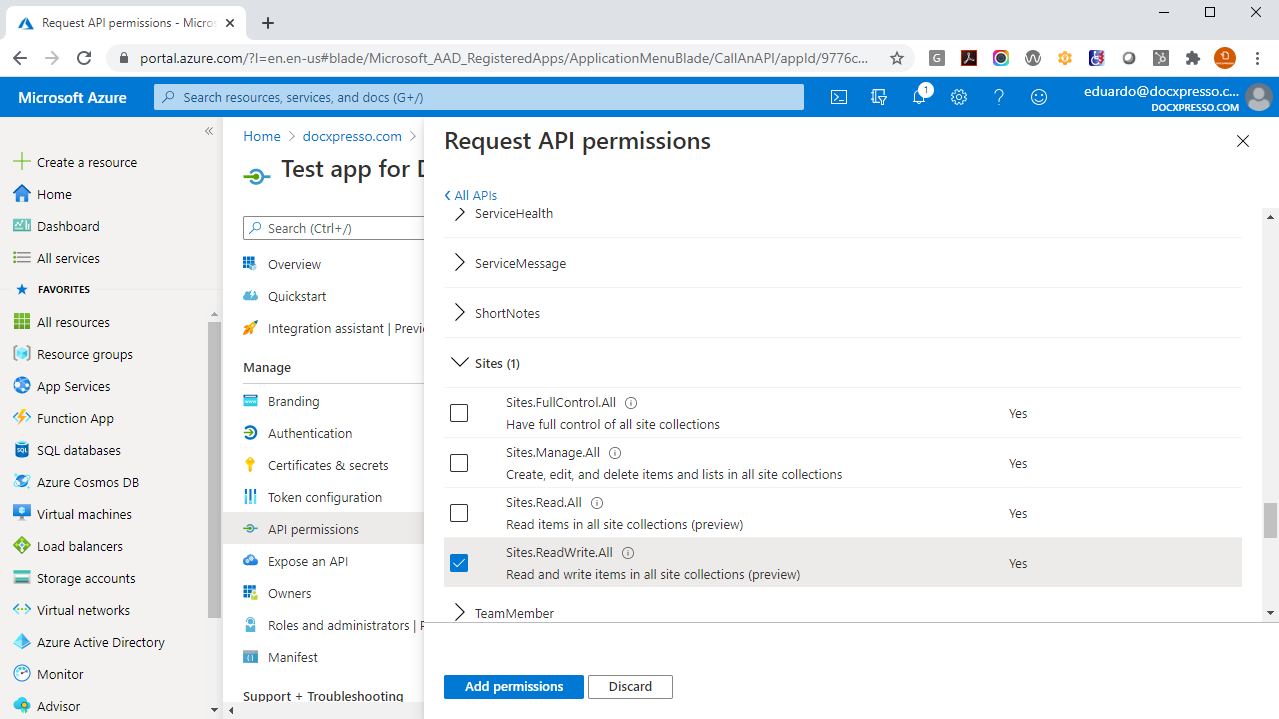
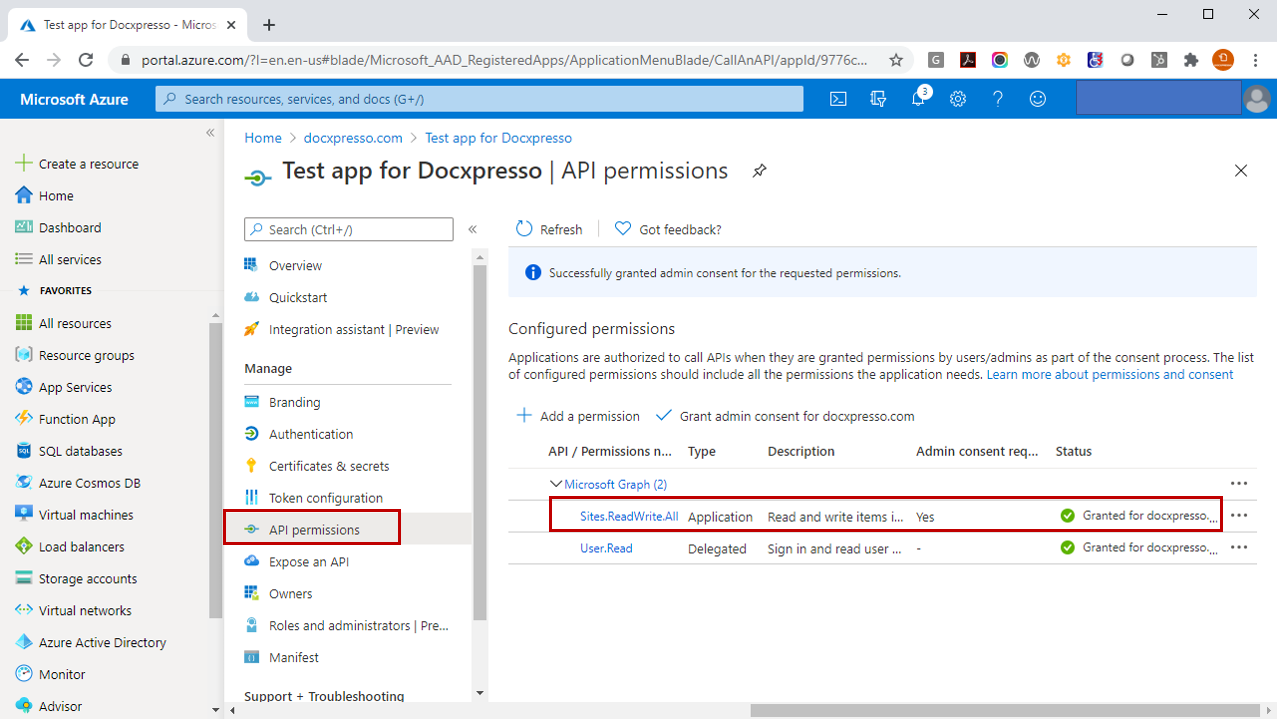
Choose like permission Sites.ReadWrite.All:
And click on Add permissions to be redirected to:
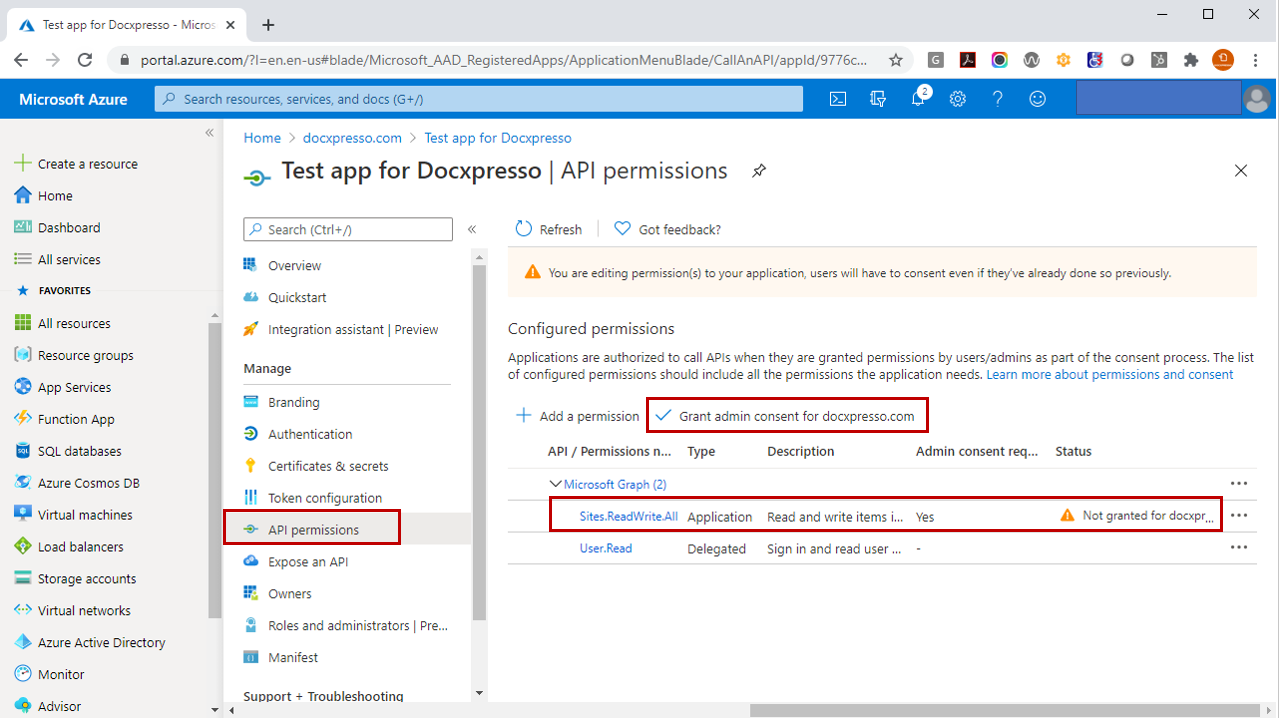
If you are requested to grant admin consent just click in the Grant admin consent button:
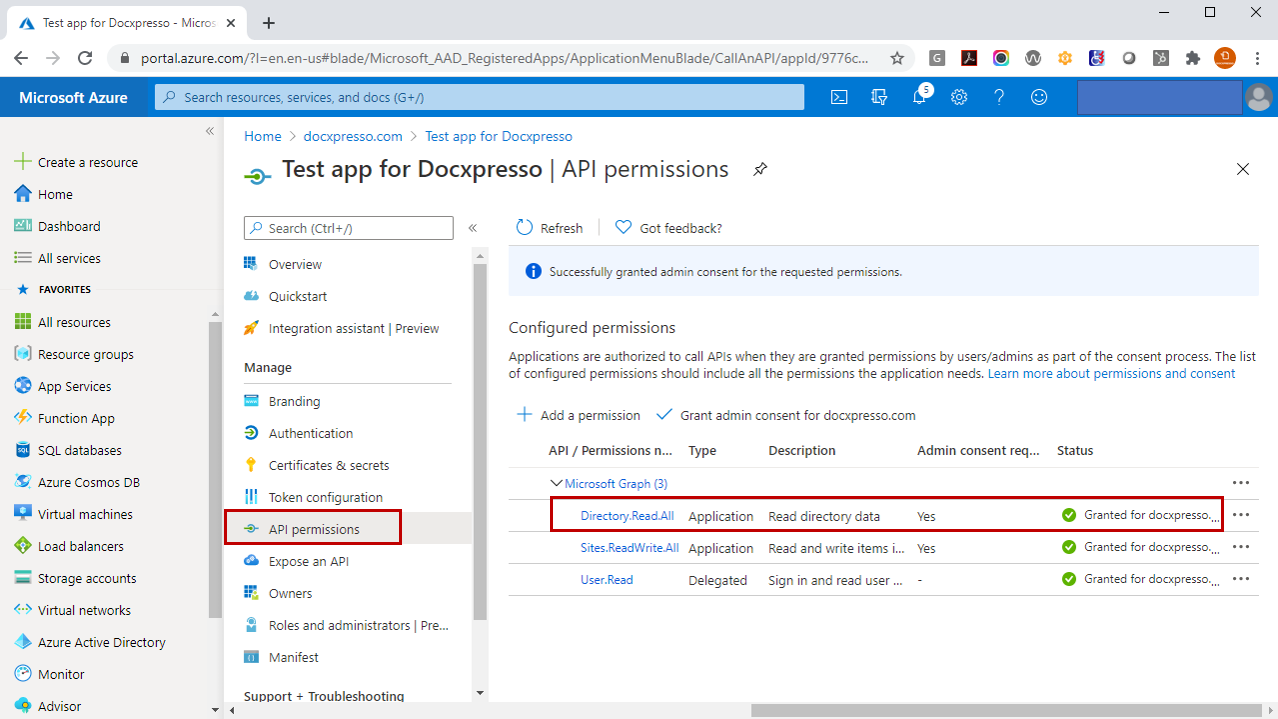
You need at least to add a further permission to have access read to the Directory: Directory.Read.All. After following the same procedure one finally gets:
Selecting a user to connect to Microsoft OneDrive
The last step is to associate a user to be used to store the required files to be used remotely by Docxpresso.
You may use an existing one or create a specific one to handle the required files.
Just Click in the Azure Active Directory and the Users menu entry and choose the user:
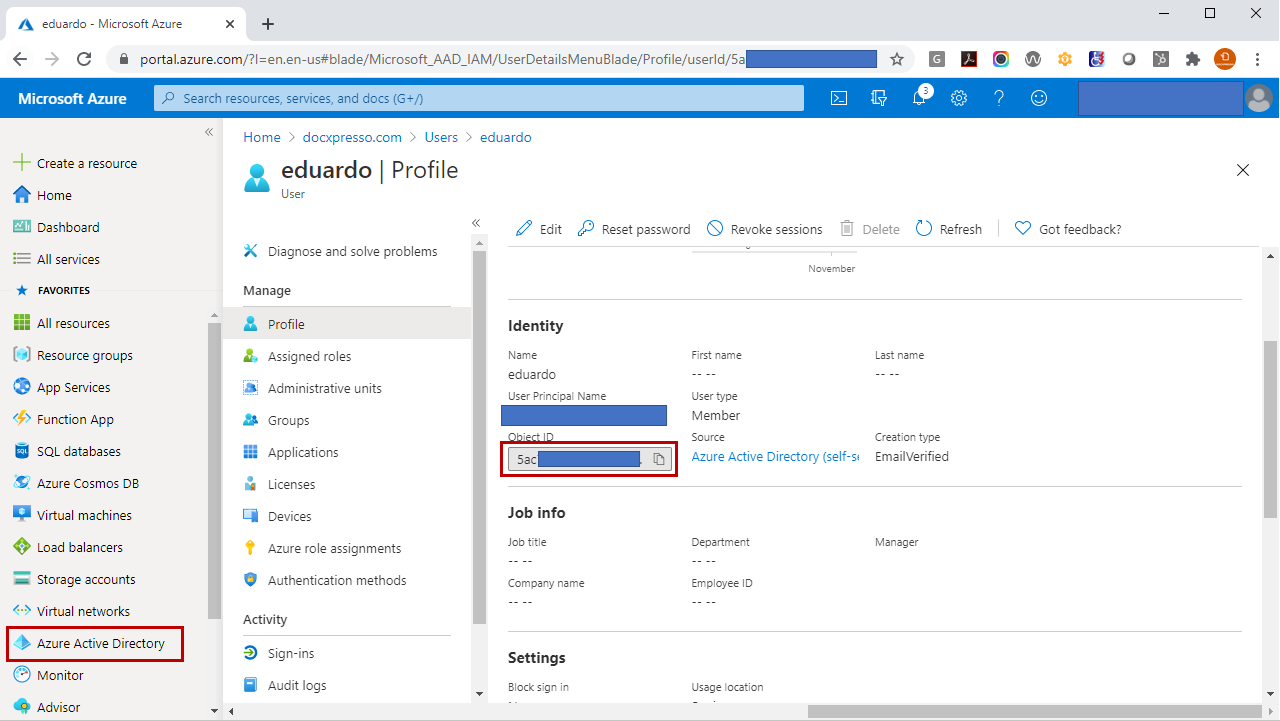
Then copy the User (object) ID.
Docxpresso Configuration
With all the gathered app data we may now easily configured the Docxpresso integration.
Go to Integrations > Cloud providers and click on the Microsoft tab:
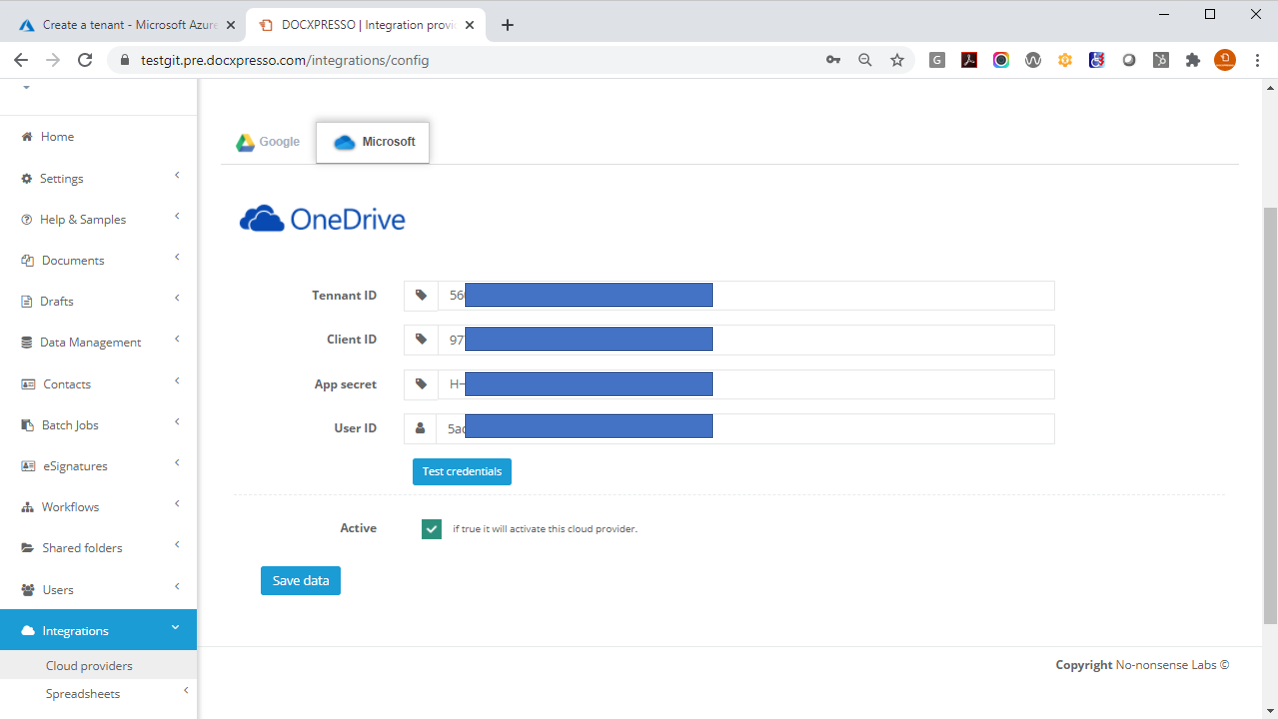
Include the requested info and hit the Test connection button and if the response is that the
connection has been correctly set up just hit the Save data button. If otherwise you get an error you must check:
- The required input fields coincide with the ones were generated in Azure Active Directory
- Make sure that the Azure App enjoys the required permissions:
- Directory.Read.All
- Sites.ReadWrite.All
- User Read
Cloud Spreadsheets
In order to connect an Excel file stored in Microsoft OneDrive, Microsoft365 o SharePoint we need to “parametrize” them within Docxpresso, but fortunately this is simple.
In order to create a connector one should first click on Integrations > Spreadsheets > Add spreadsheet to access the following interface:
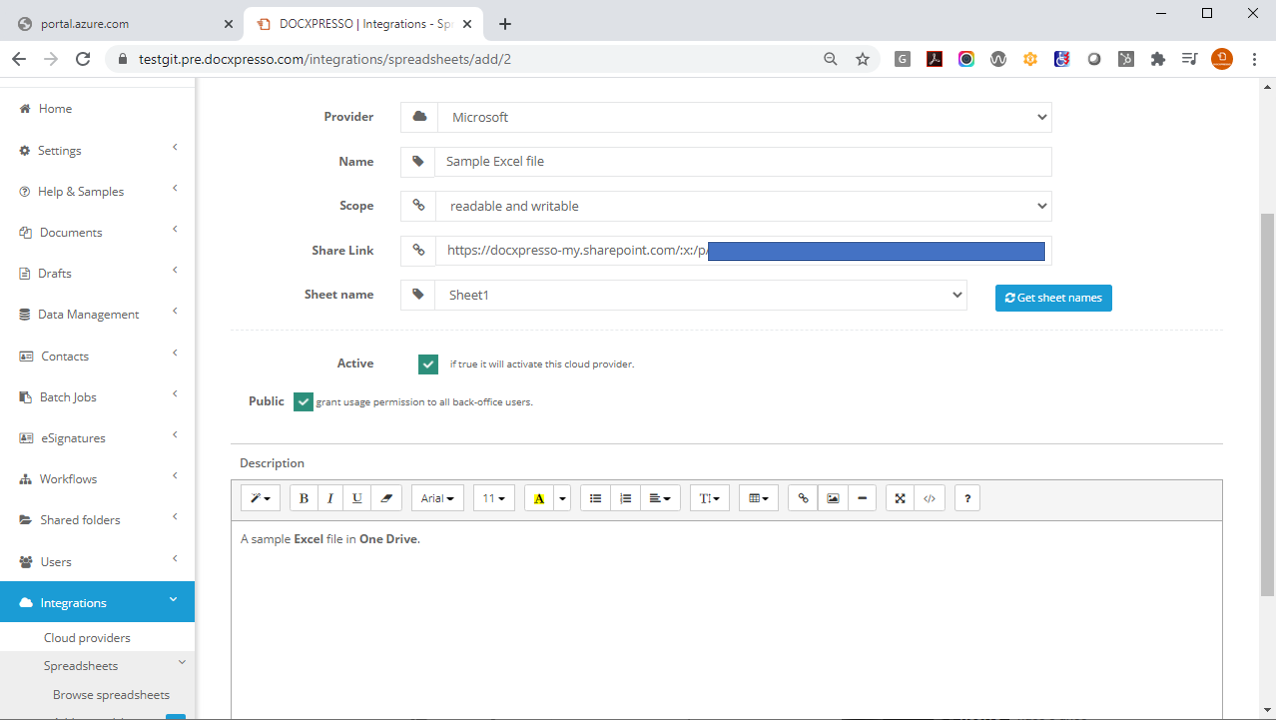
After choosing Microsoft as cloud provider one should include:
- A name to identify the spreadsheet within Docxpresso
- The scope has the following options:
- Readable: only to import the data to a Docxpresso document
- Writable: only to export data from a Docxpresso document
- Readable and writable: both import/export
- The share link to connect to the selected spreadsheet.
- Sheet name: one can only import/export from a single sheet within an Excel file so the user is prompted to select one: click on Get sheet names and select one from the dropdown
IMPORTANT: If you want to export data to an Excel sheet you should include all data within a table. The exported data will be included as last row of the first table found in the selected sheet.
IMPORTANT: the first row of the selected sheet should include the field names that ideally coincide with the one used in the associated templates (although this is not strictly required as we will see later).
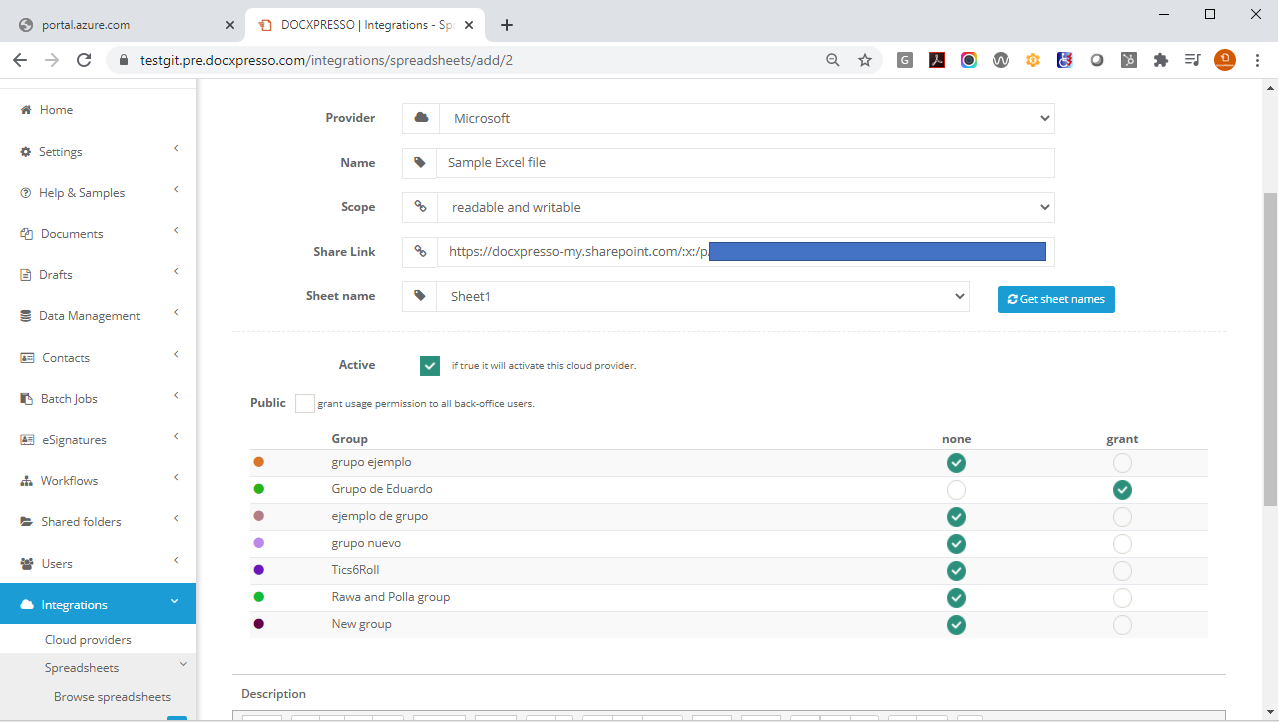
You may also limit the usage permissions by group in case you uncheck the Public checkbox:
Once you have defined the spreadsheet within Docxpresso is ready for its use.
Import data from a Cloud Spreadsheet
Whenever a backoffice user is editing a Docxpresso document or web form (s)he is offered the possibility to import data from a predefined spreadsheet.
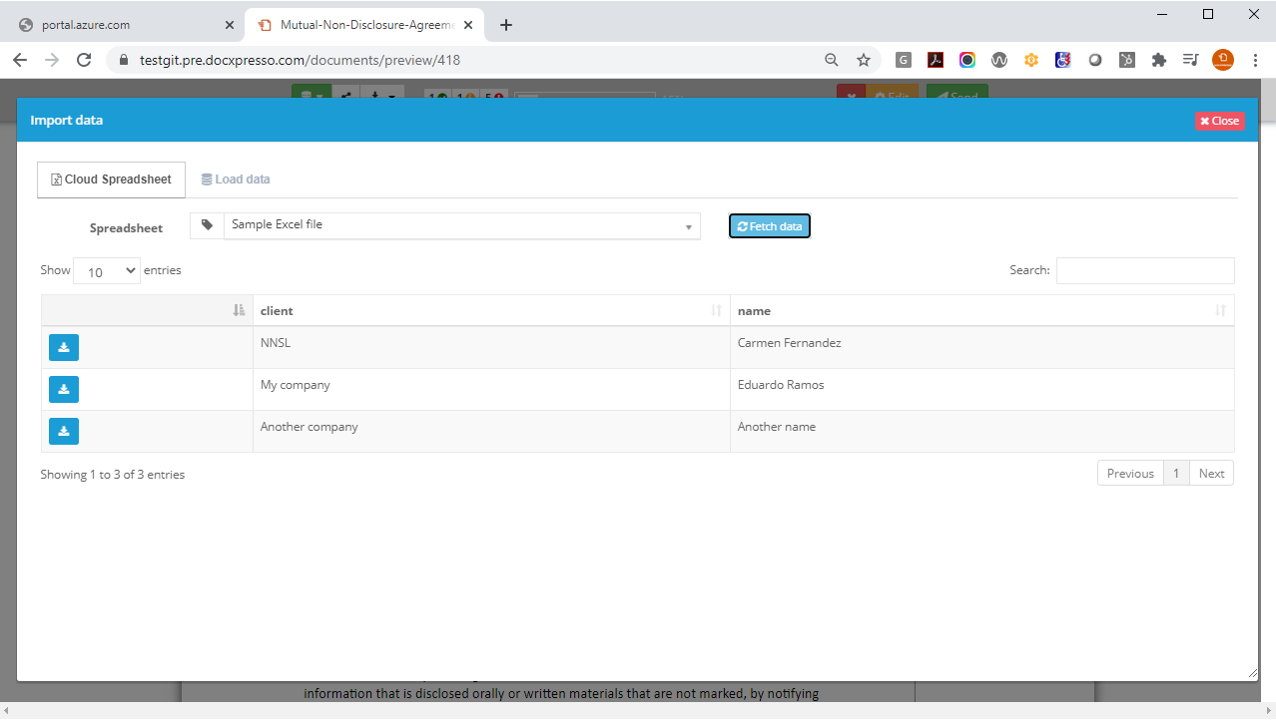
For the purpose of illustrating the process we have created a very simple excel sheet with only a few fields that is stored as a cloud Microsoft365 spreadsheet:
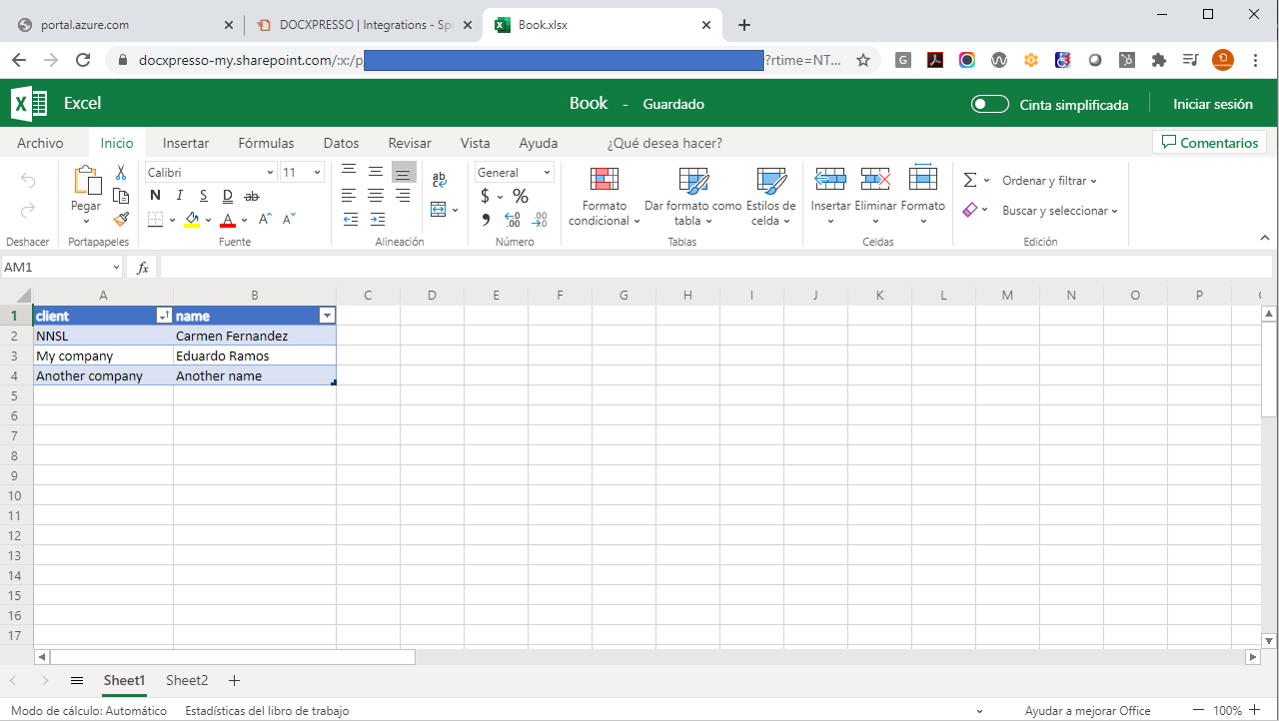
NOTICE: the data has been included within a table to allow also for insertions, although this is not needed if we just want to read from it.
The back-office users of Docxpresso may access this Excel data from:
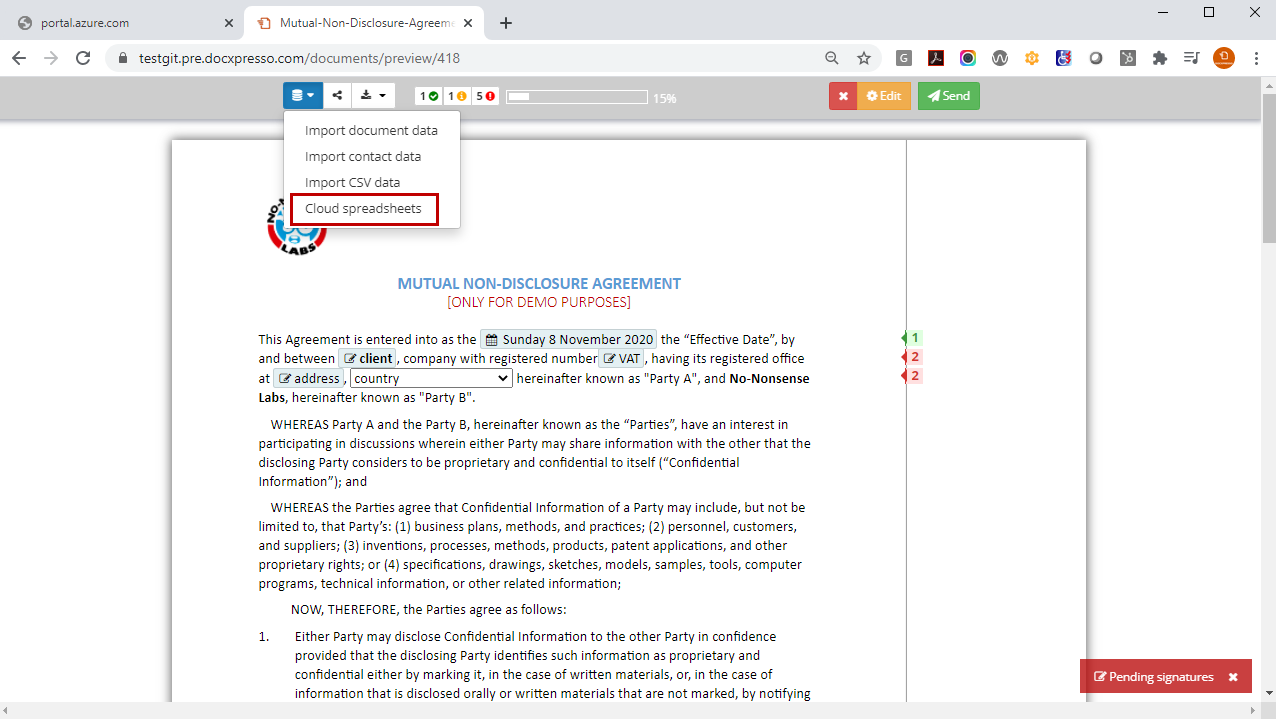
To open a popup interface where to choose from one of the available spreadsheets:
By clicking on the “load” button of the selected row we are redirected to an interface where we can map the spreadsheet fields of our choice to the available Docxpresso template fields:
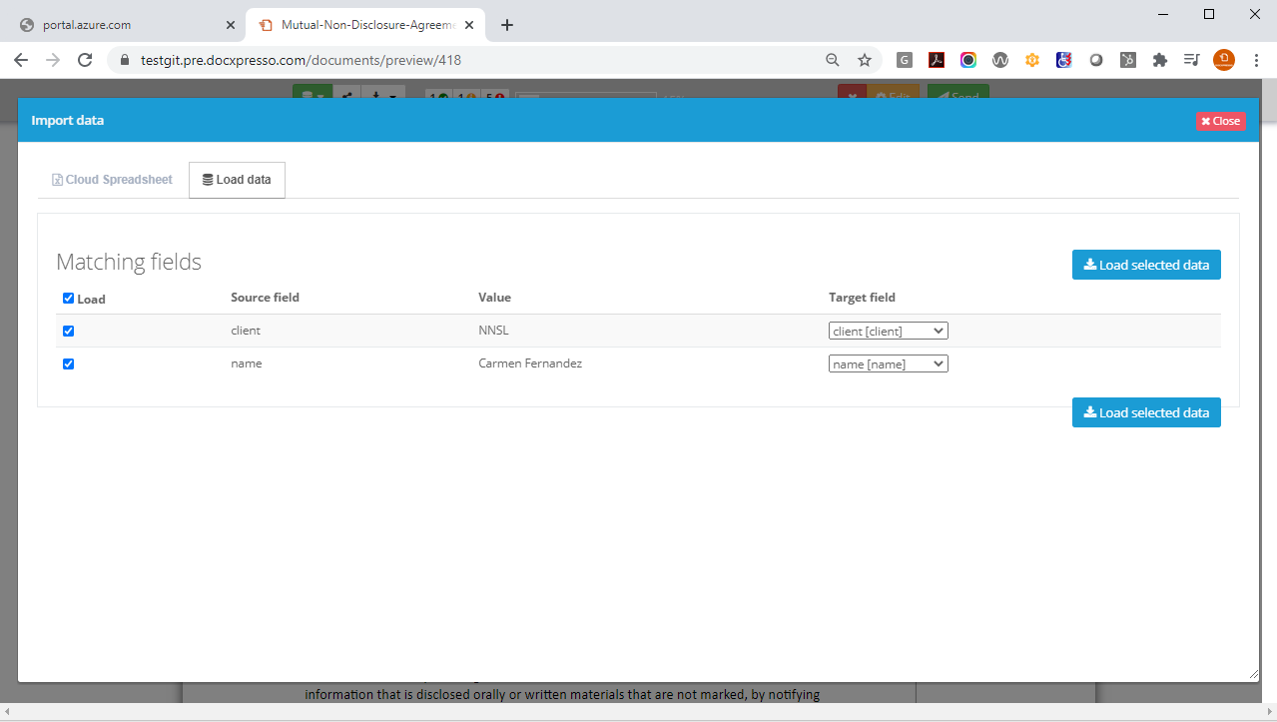
Note that:
- Coincident name fields are automatically mapped.
- We can manually change the automatic binding by clicking in the dropdown menu and selecting a different target fields.
- By checking or unchecking the fields we may decide which data to load into the template.
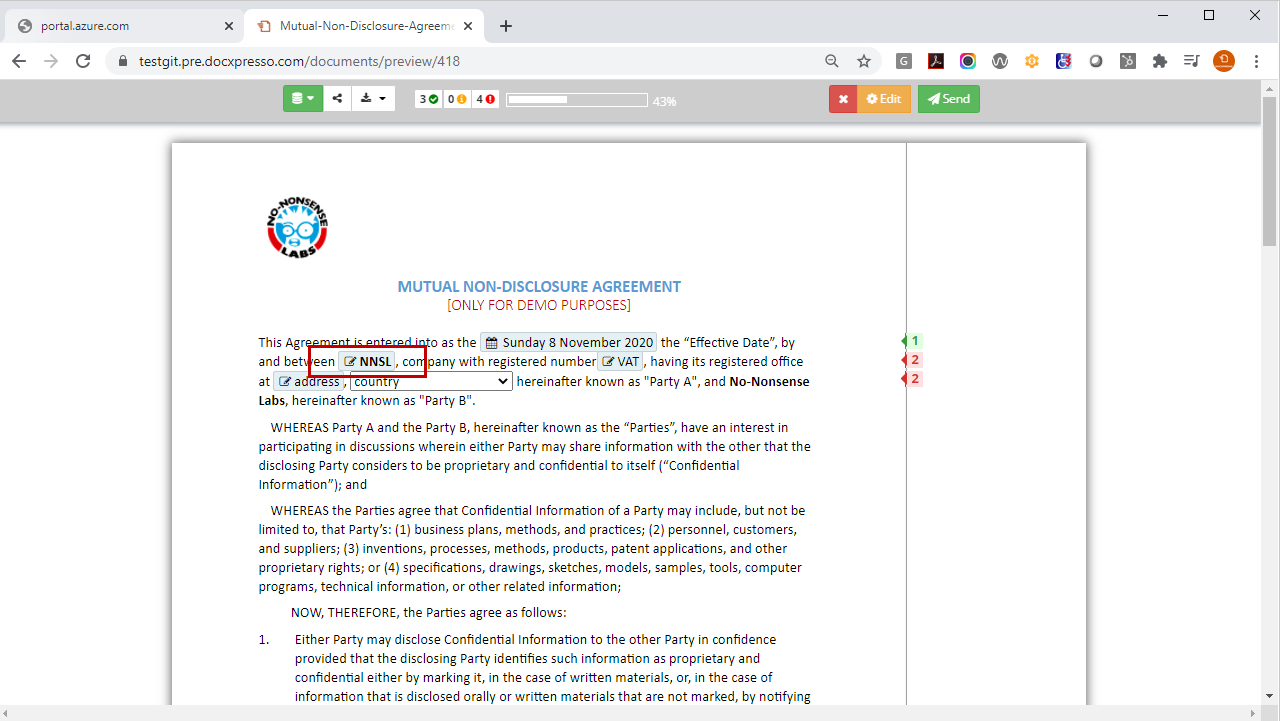
Whenever we are ready we may load all the selected data by clicking on the Load selected data button and import it into our document:
Export data to a Cloud Spreadsheet
As explained before we may also use Docxpresso to export data to an existing cloud Excel spreadsheet.
Let us use the same template and Excel file as before but now to implement the opposite process, i.e. to load data from the document into the selected Excel sheet.
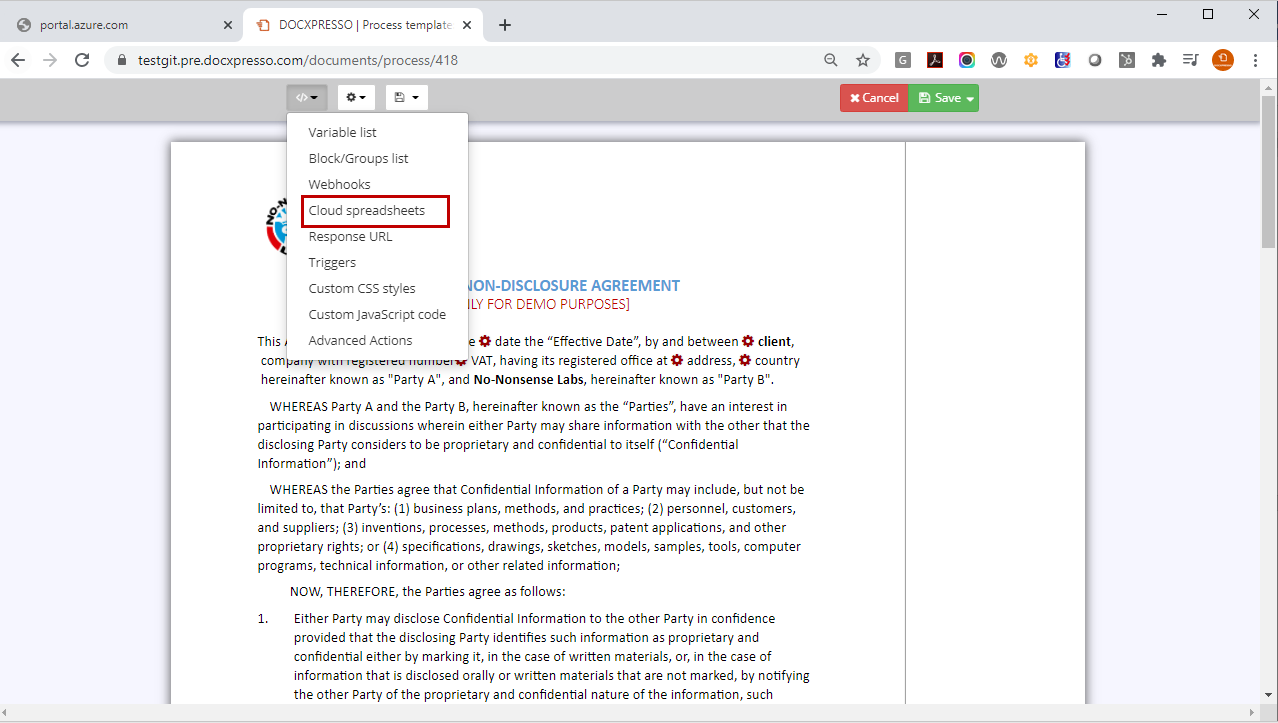
First open the template edition interface within the Docxpresso back-office and then click on Cloud spreadsheets
from the dropdown menu:
Then the following interface opens:
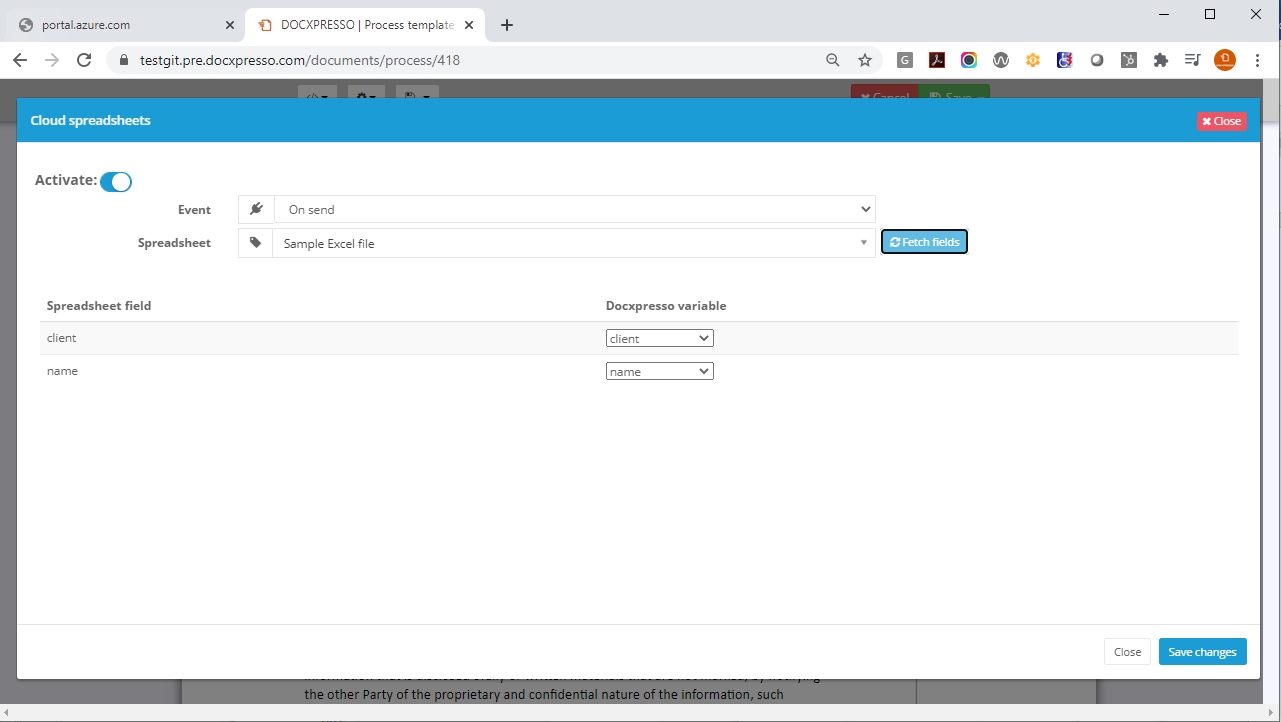
Within this interface one should:
- Click on the activate switch if we want to activate the remote data exportation process.
- Choose an event:
- On load: the export will be carried out each time the document is filled and saved.
- On set as completed: the export only will be processed whenever the document is explicitly set as completed.
- Select a spreadsheet from the dropdown menu and hit the Fetch fields button.
- Select the data bindings: coincident fields will be automatically assigned although we can manually change the associations. One can also chose “empty” if we do not want that field to be mapped.
IMPORTANT: if you carry out changes in your Excel file you may need to remap the fields into the Docxpresso interface.
Finally, by clicking on Save changes you will activate the syncing of your cloud Excel file and your Docxpresso data.
